My goal for this level was to design an area with a moody, anticipatory atmosphere, as it leads to an active section featuring a huge enemy.
As a Level Designer, I was responsible for the following aspects:
Blockout
Pacing
Points of Interest (PoIs)
Readability
Narrative
Environmental Storytelling
Lighting and Fog Setup
Scripting
Iterative Progression
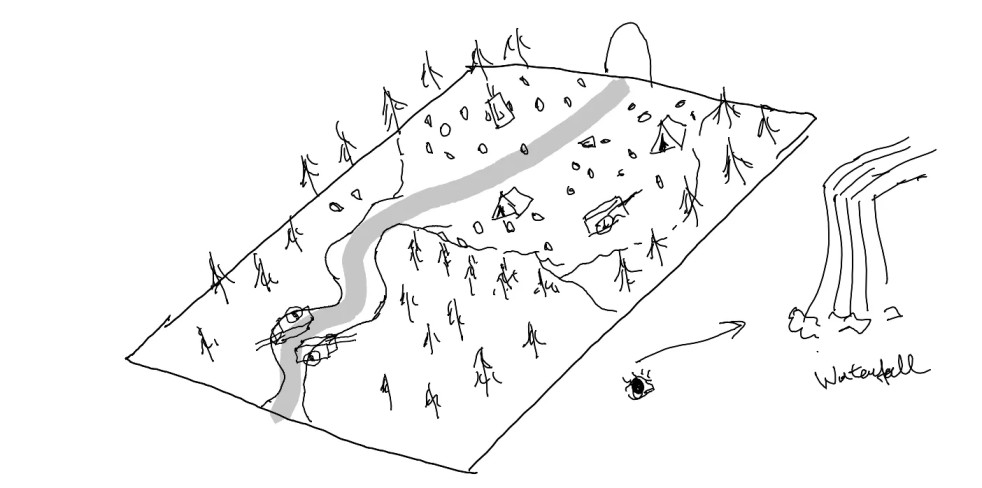
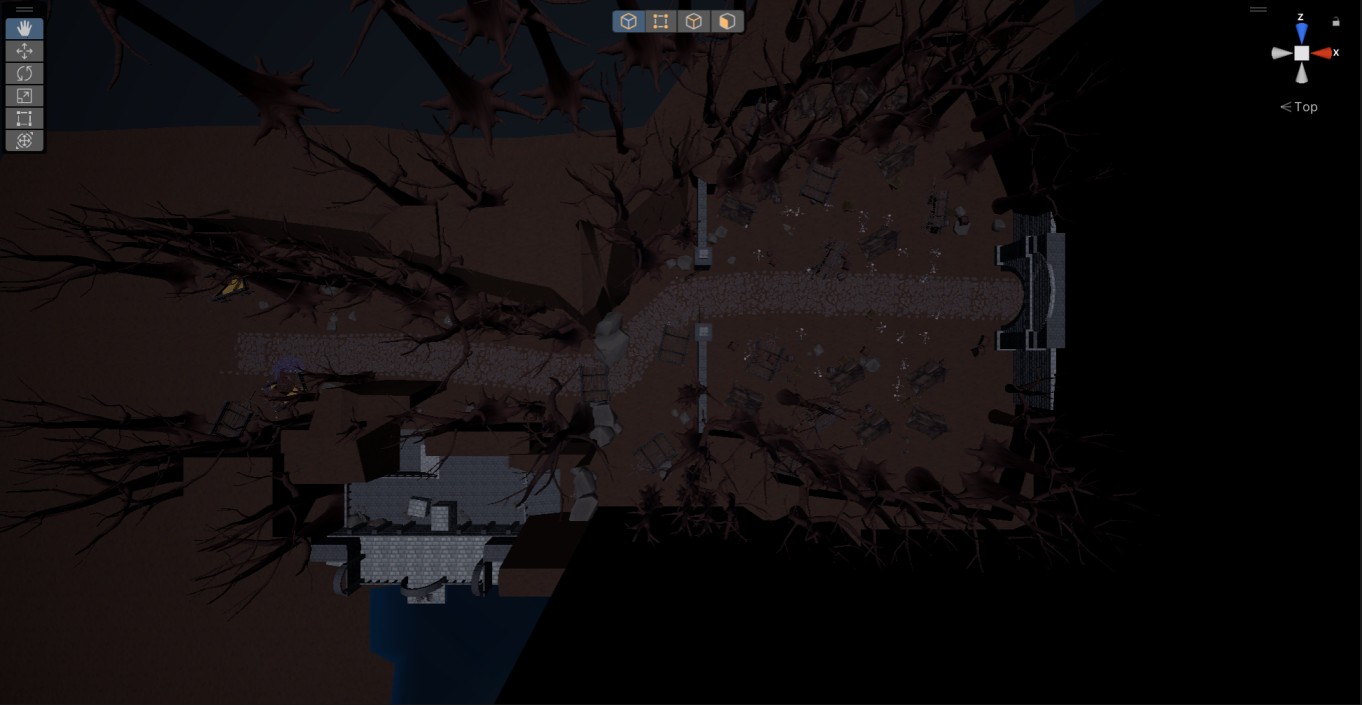
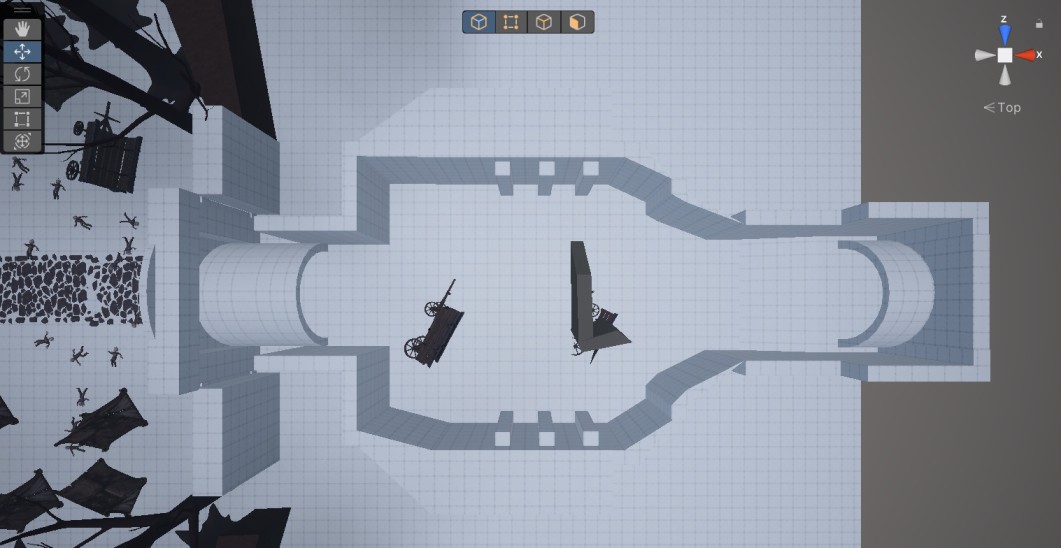
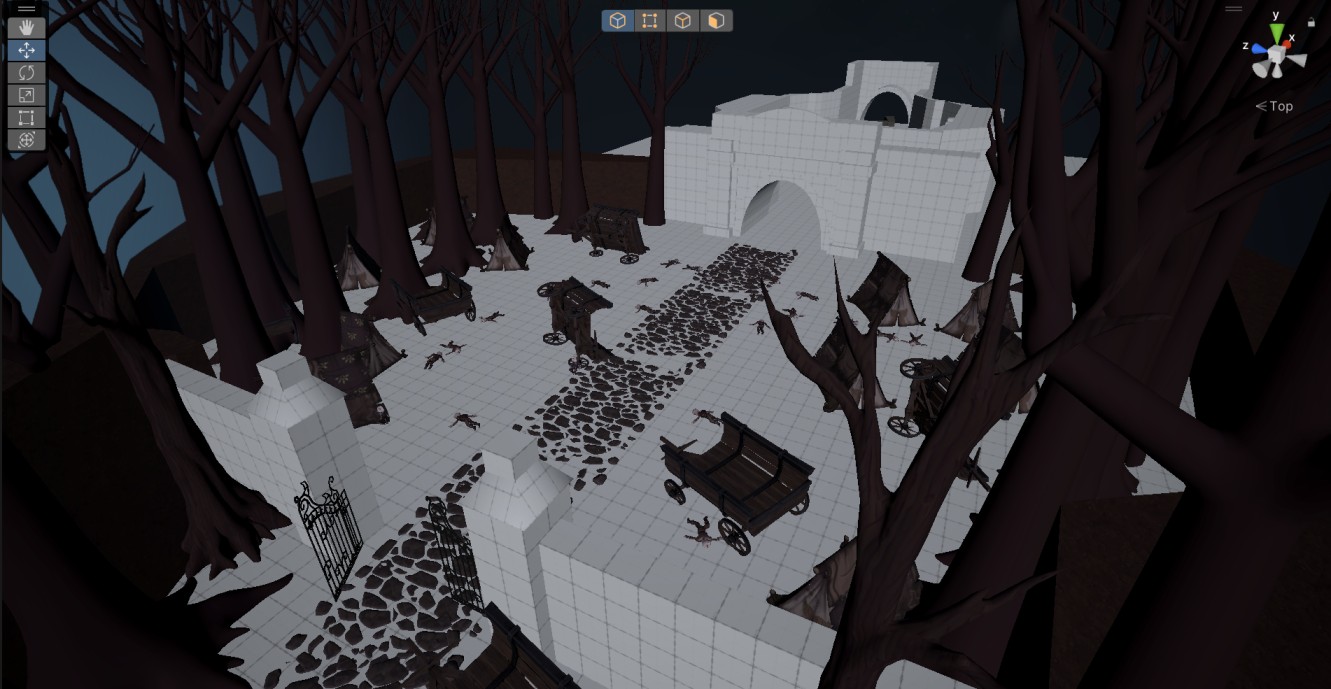
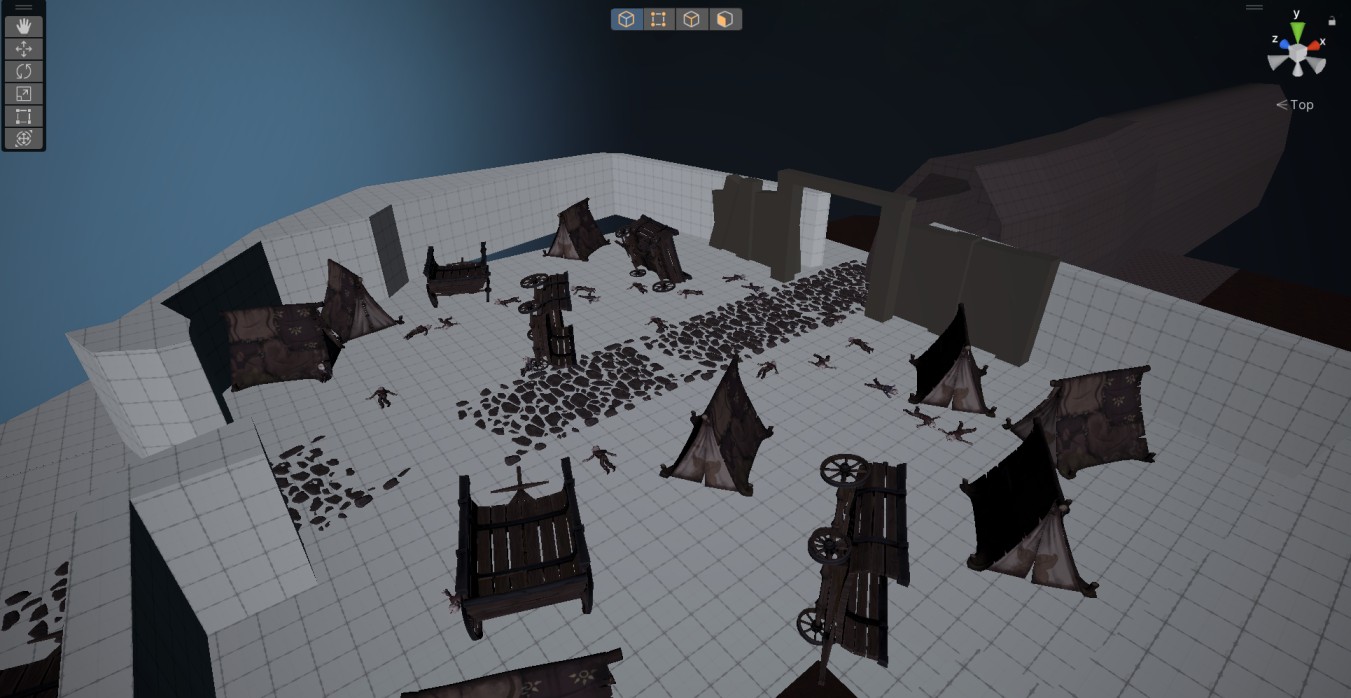
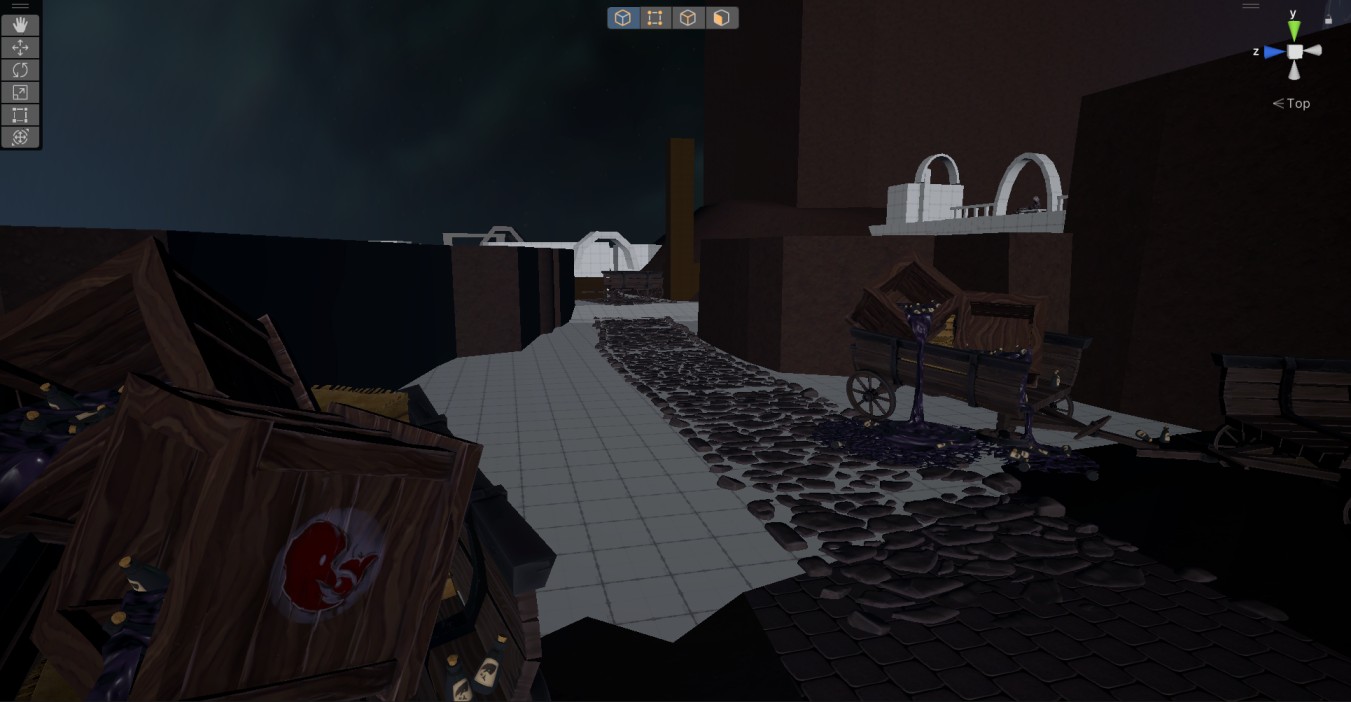
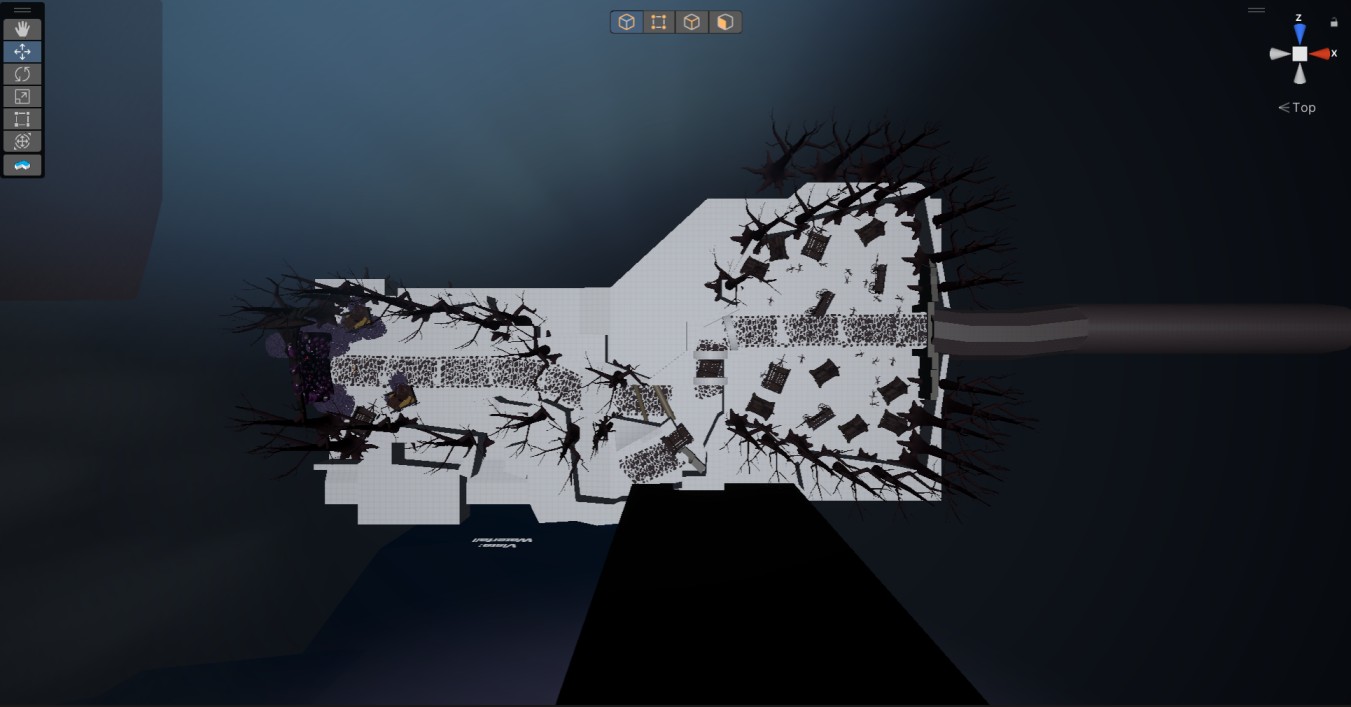
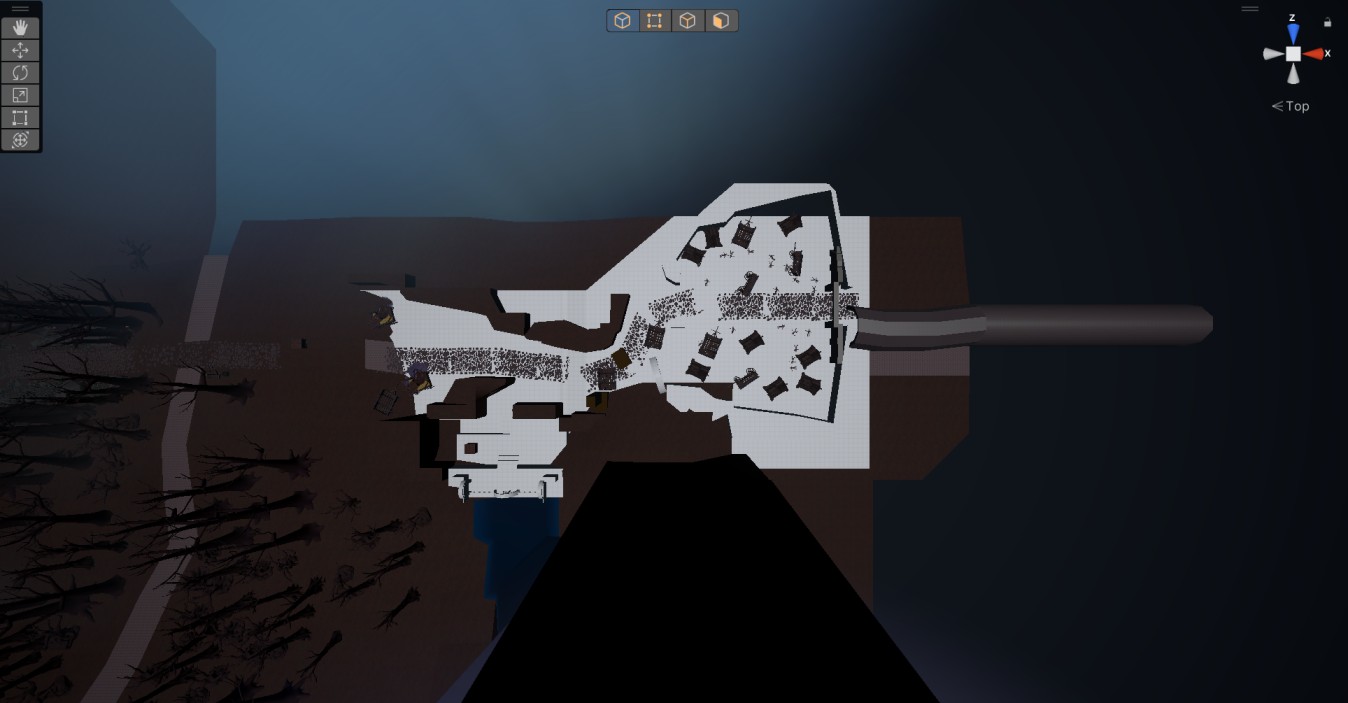
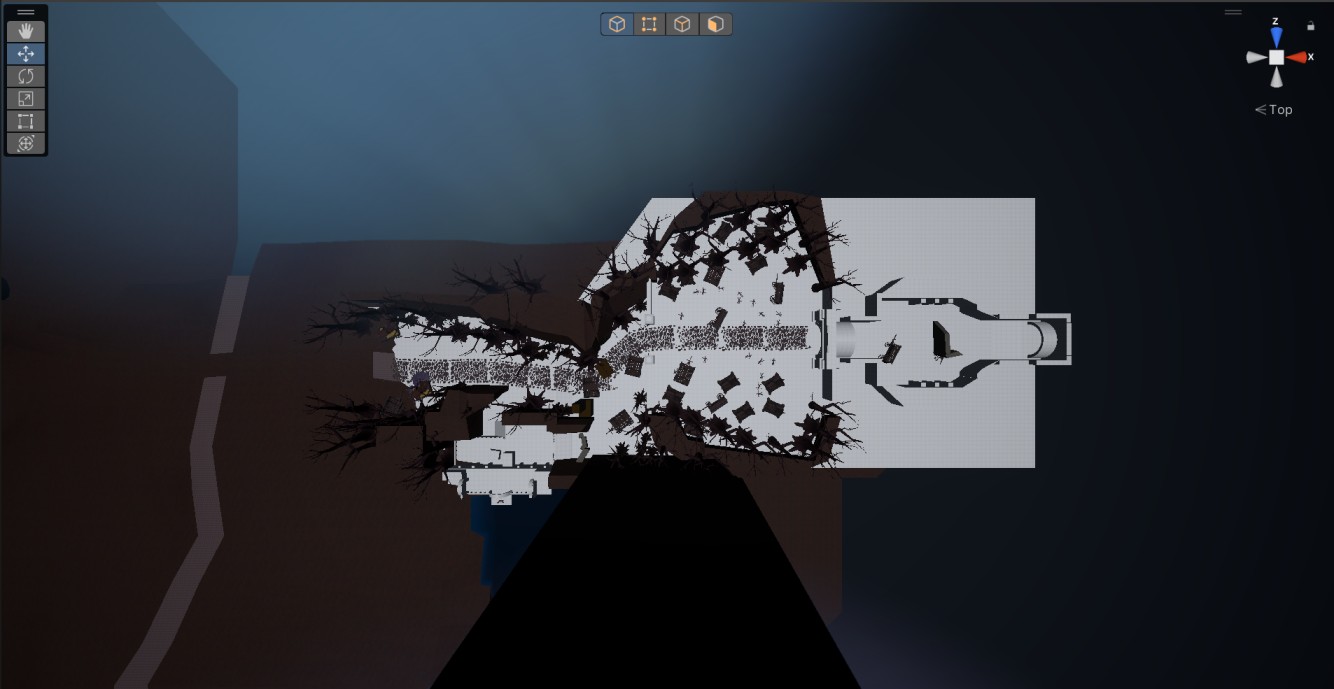
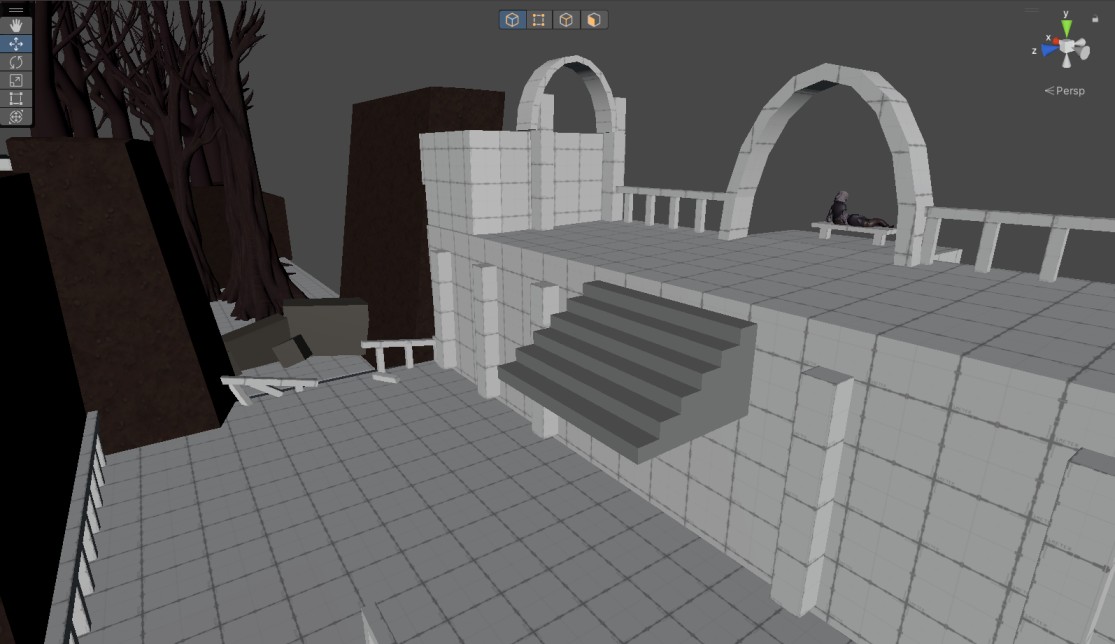
Main Area (Top View)
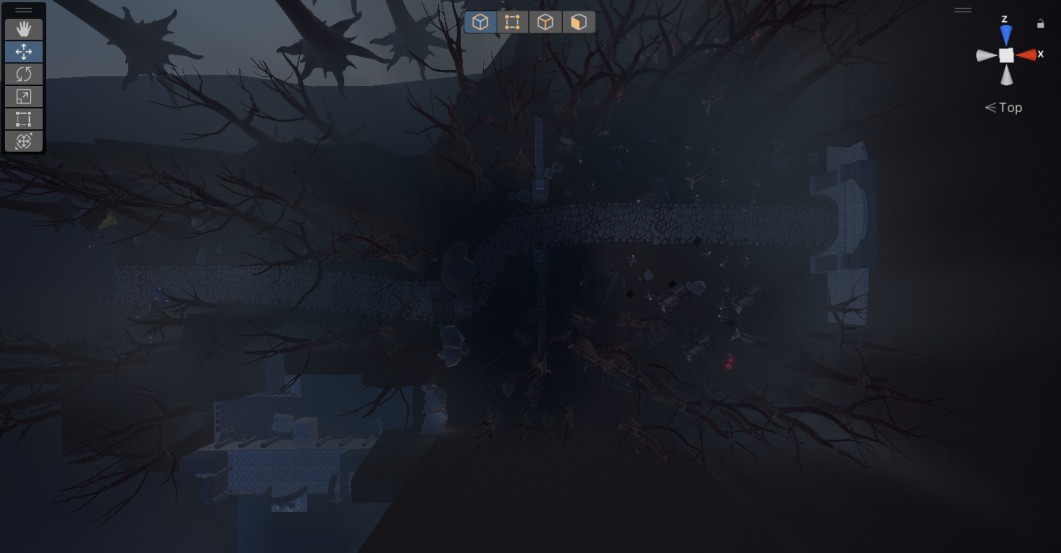
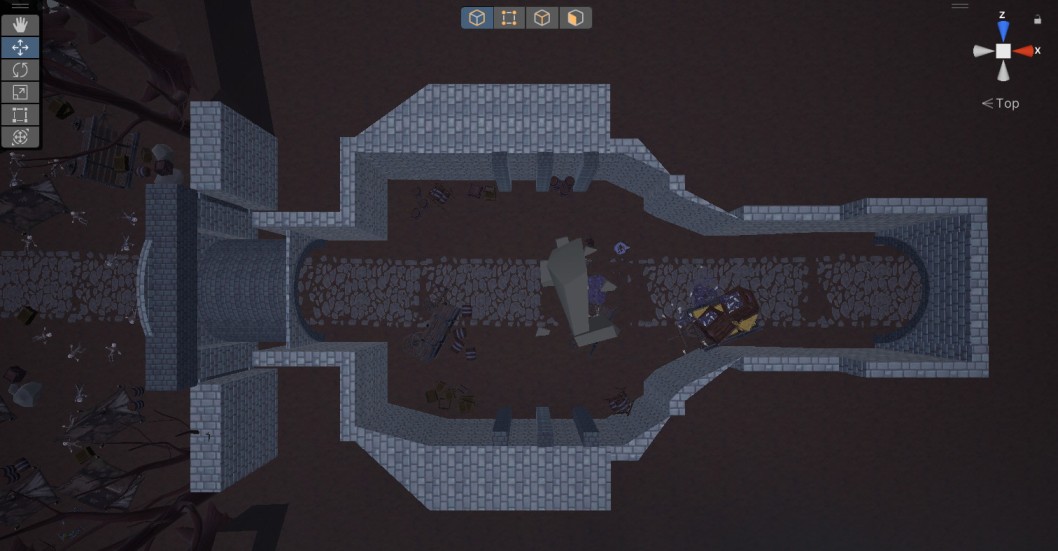
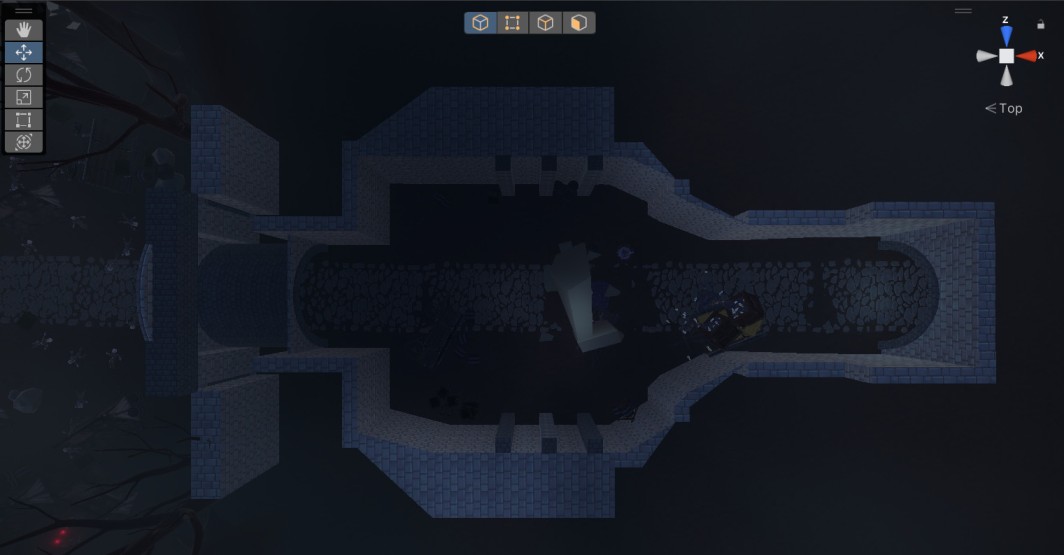
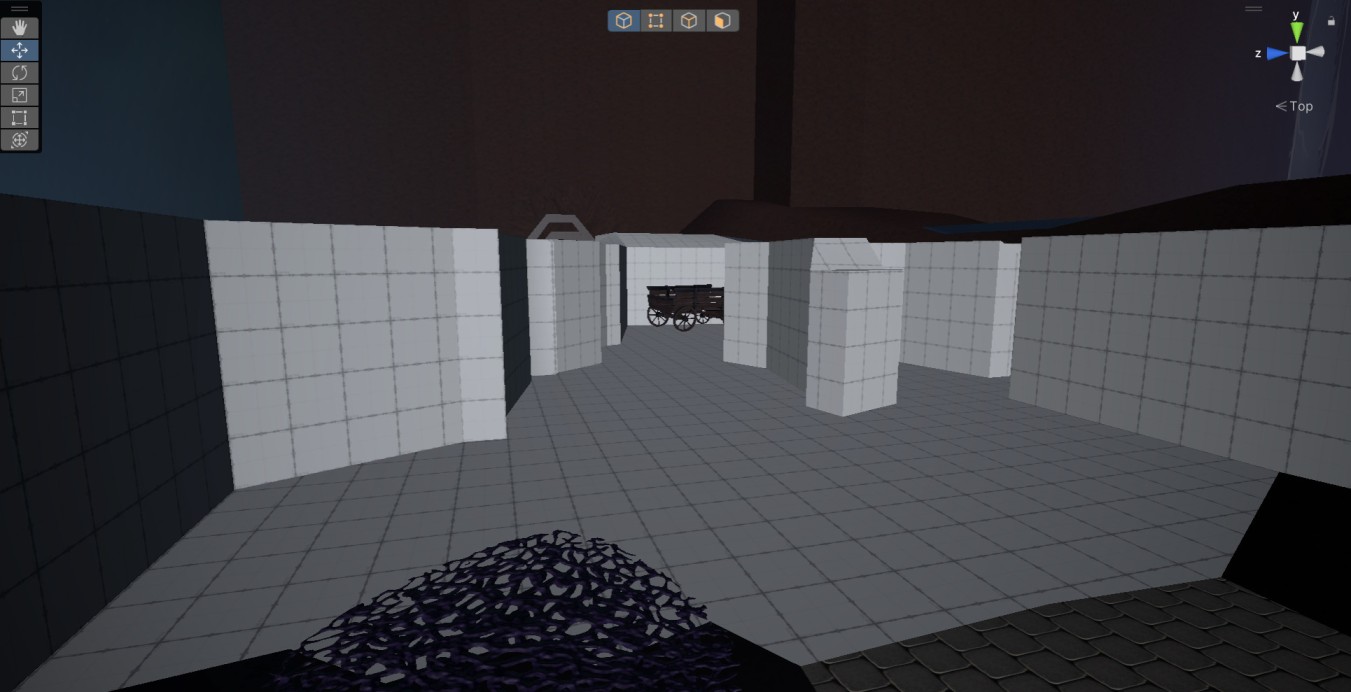
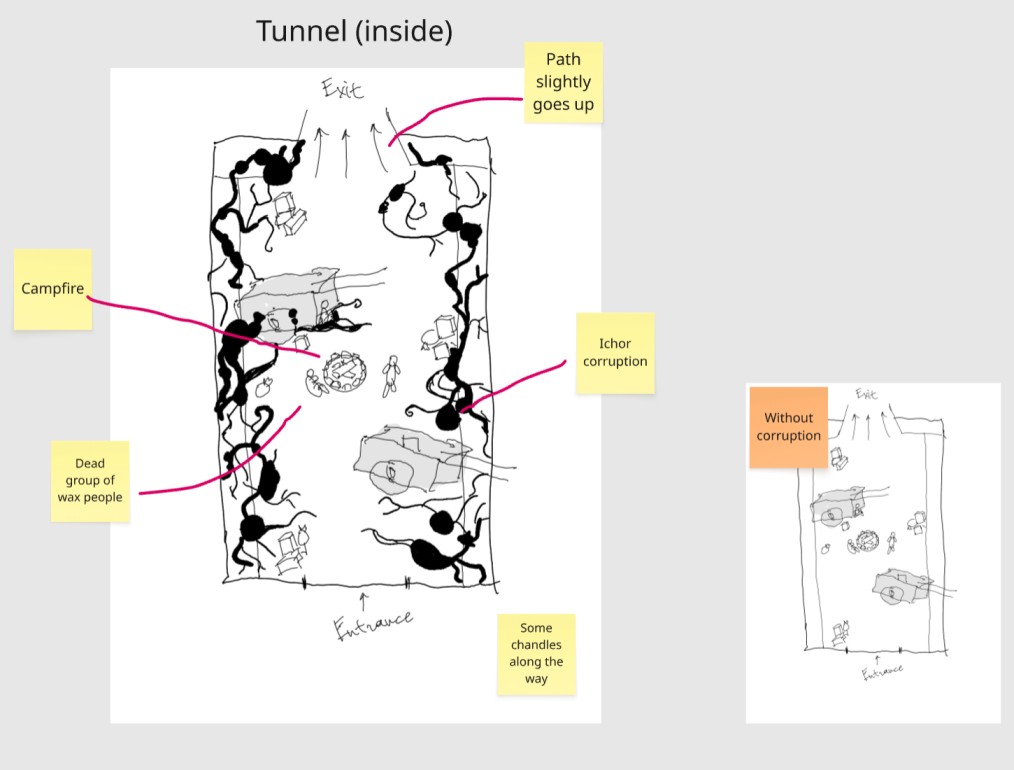
Tunnel (Top View)
Other Areas
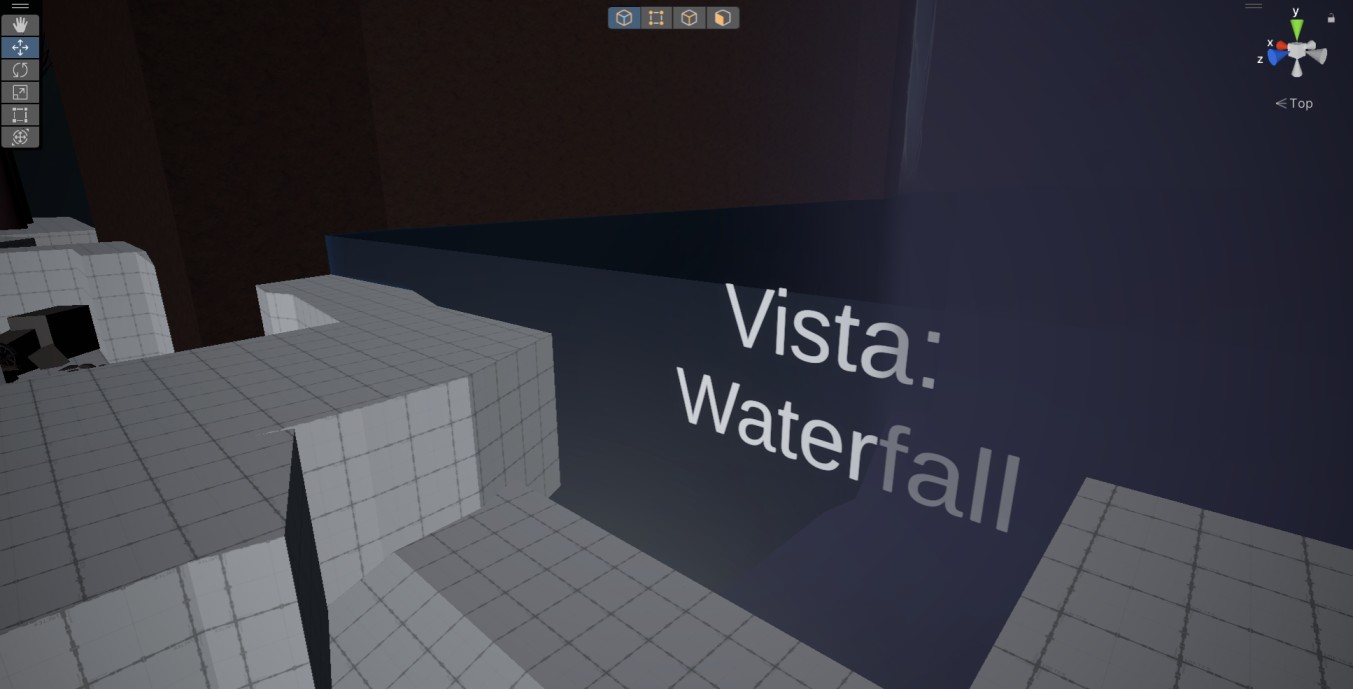
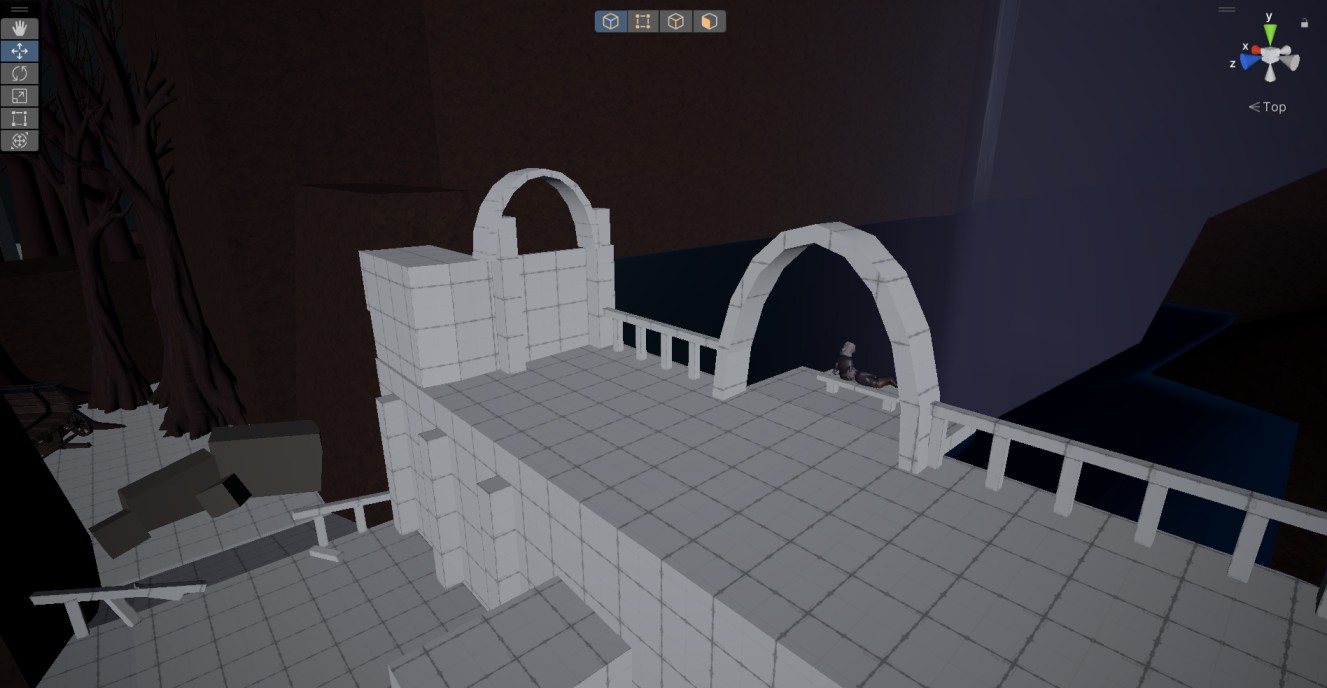
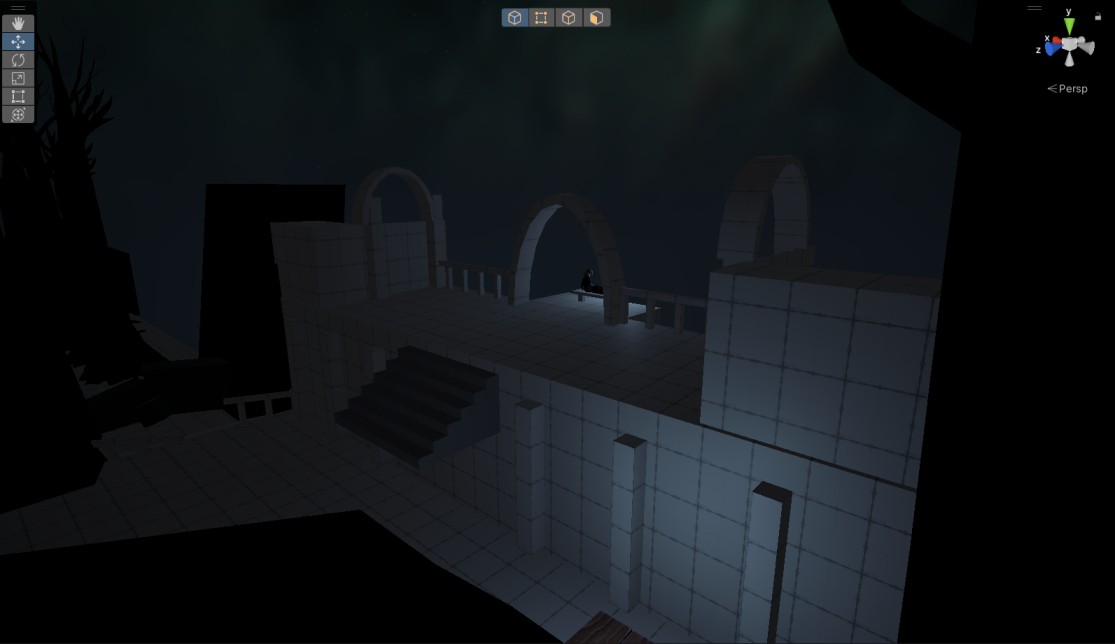
Waterfall Vista
Clearing
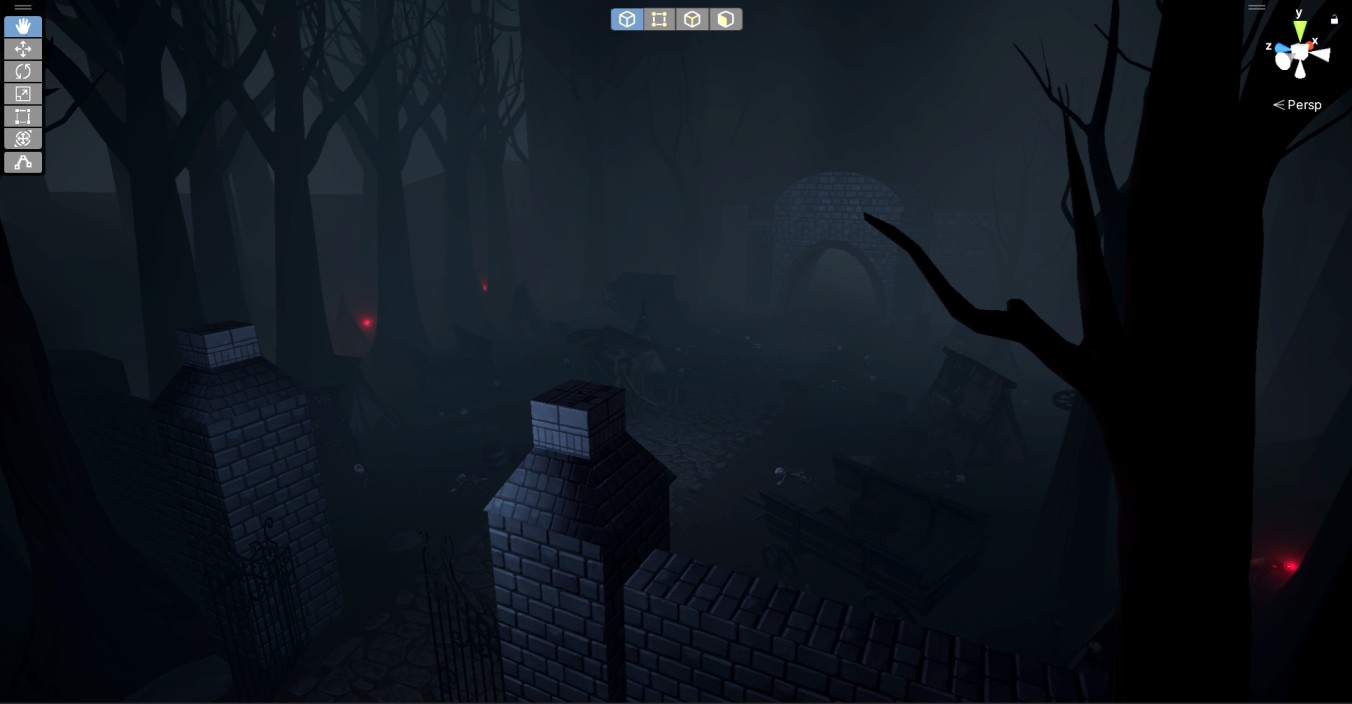
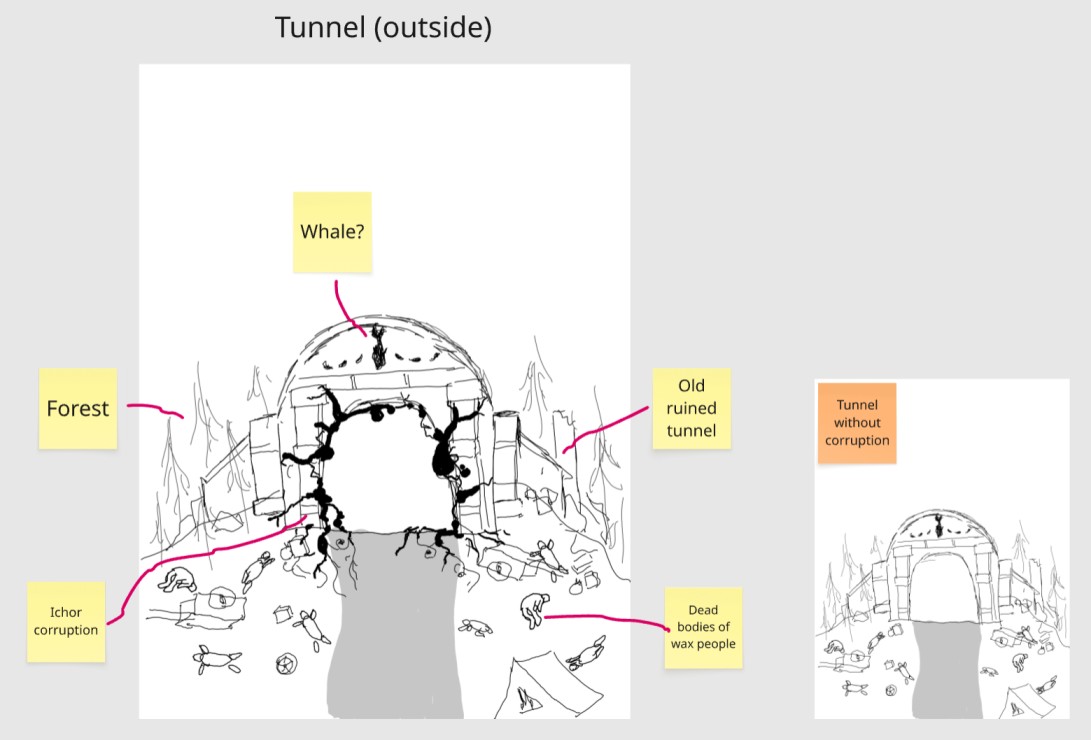
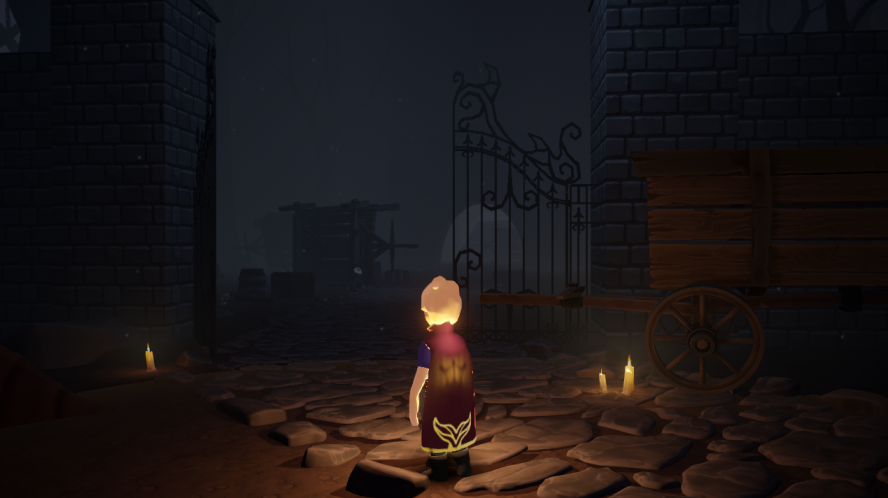
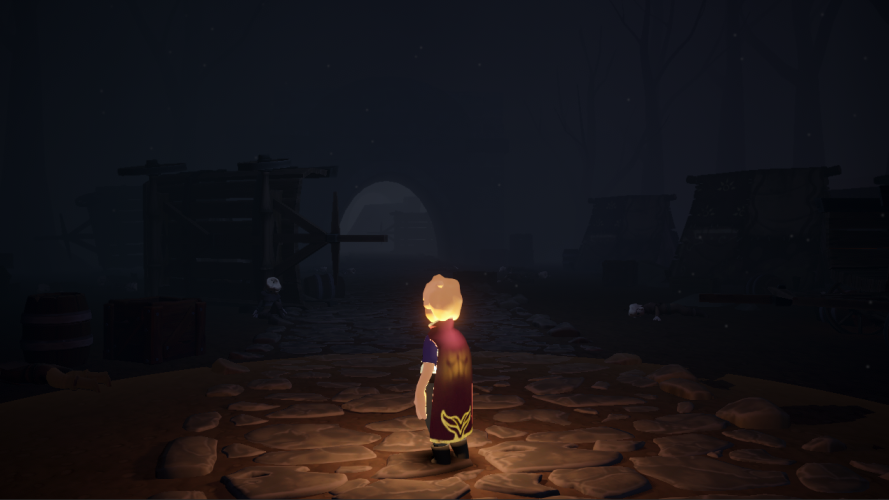
Entrance
Level Overview and Highlights
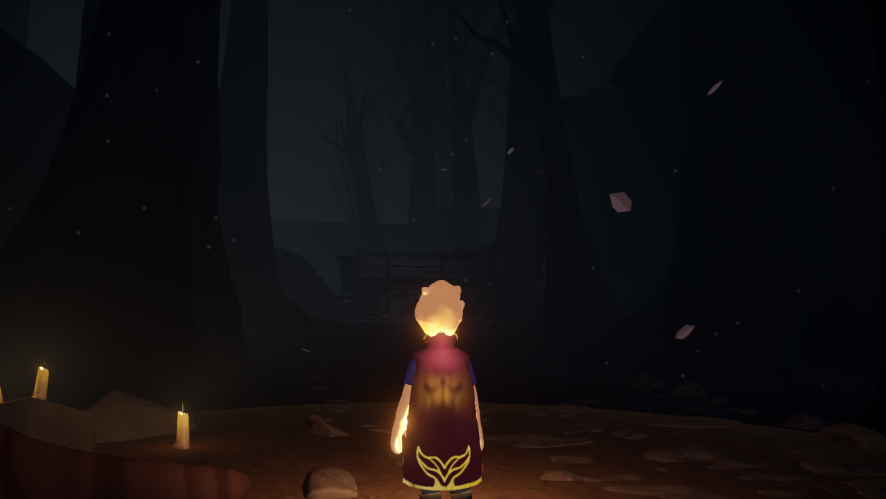
Setting: Dark fantasy
Tone & Mood: Dark, desolate, melancholic, and dangerous
Constraints:
Engine: Unity
Perspective: Third-person
Platform: PC
World-building: The level is consistent with the game’s established rules, tone, and aesthetic.
Level’s story:
Wax Boy enters this area after completing the Dark Forest chapter – a quiet pause before what comes next.
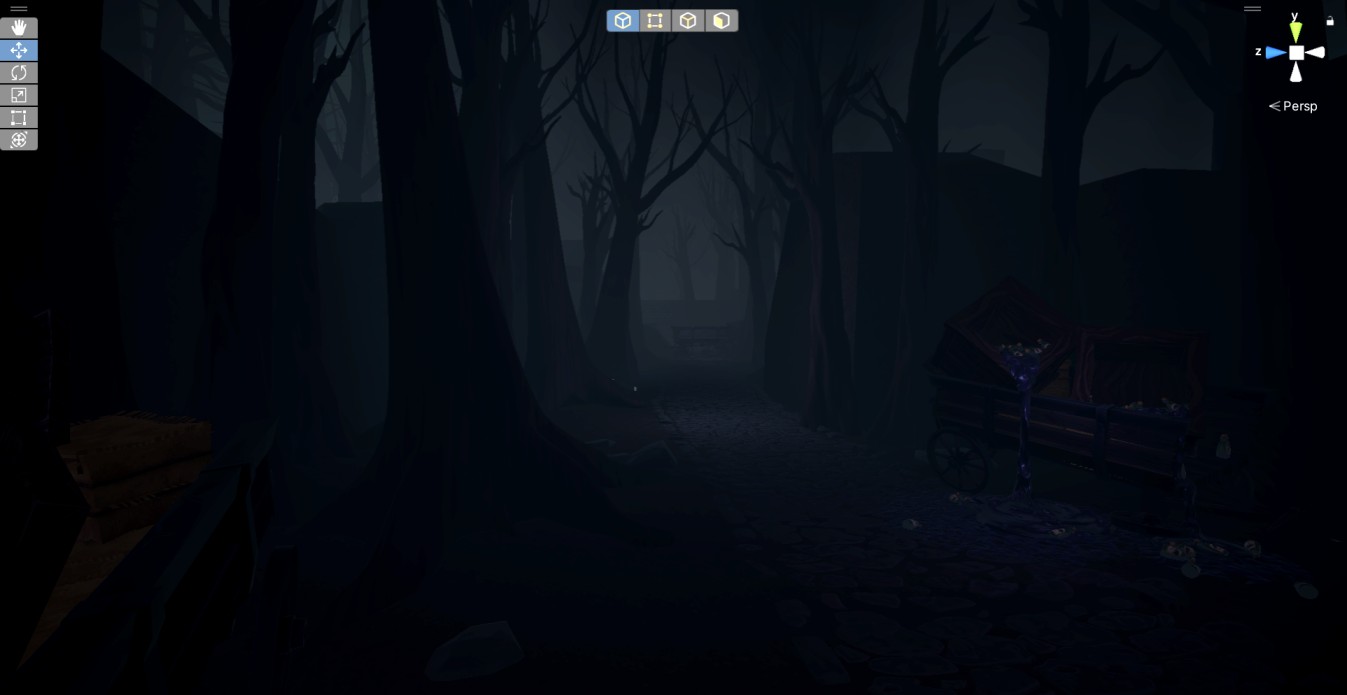
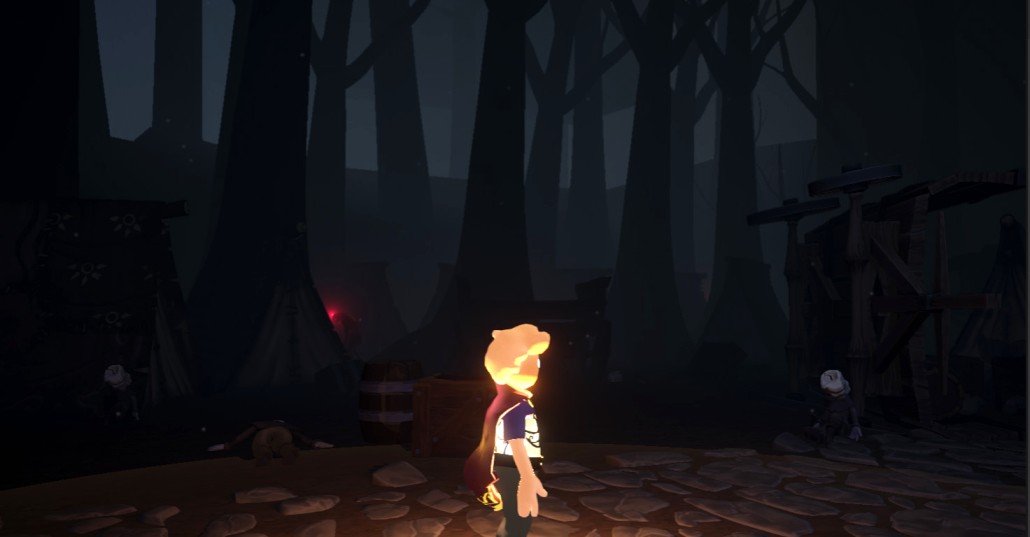
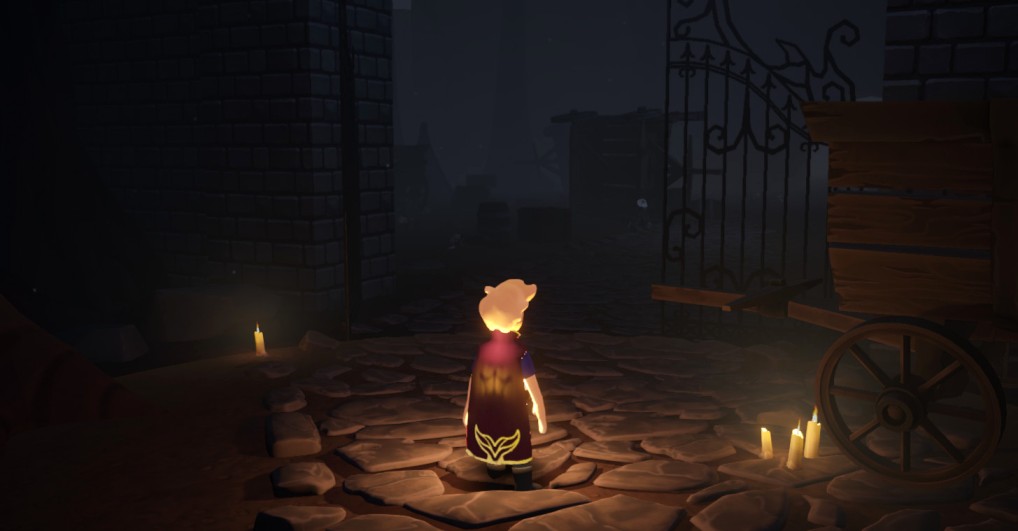
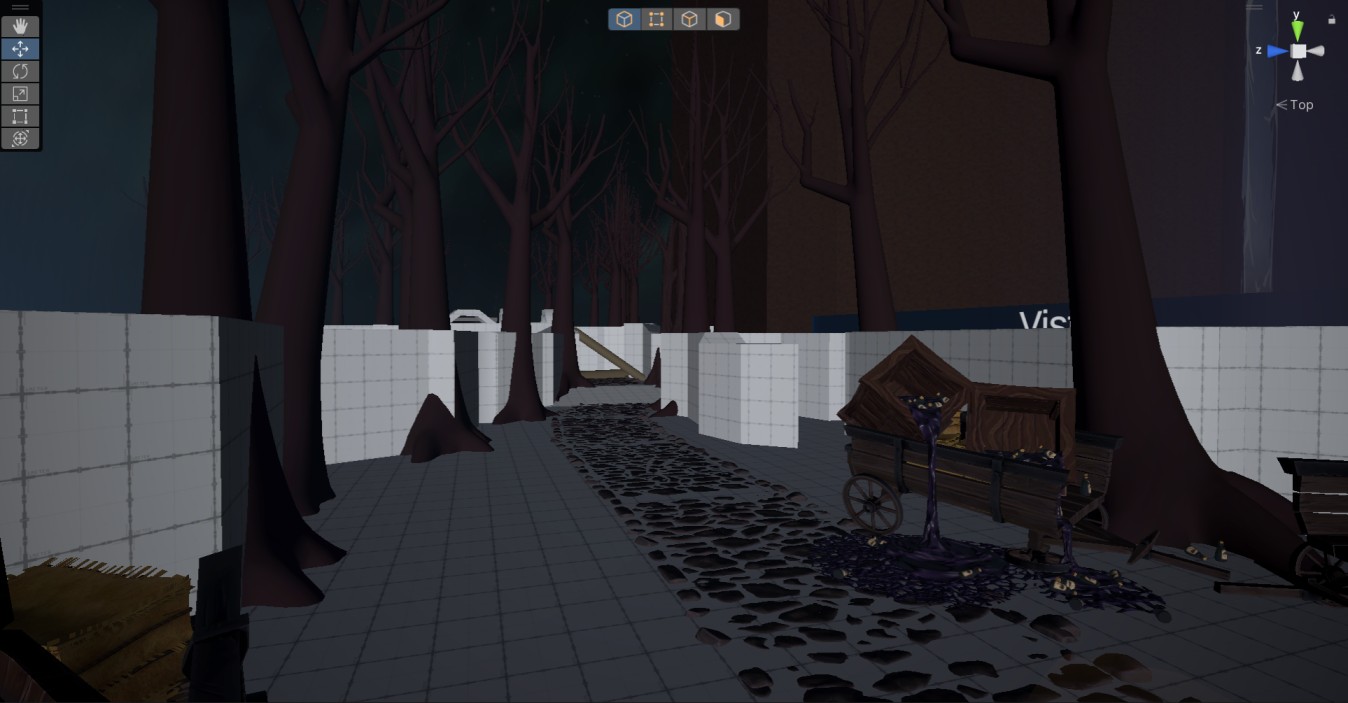
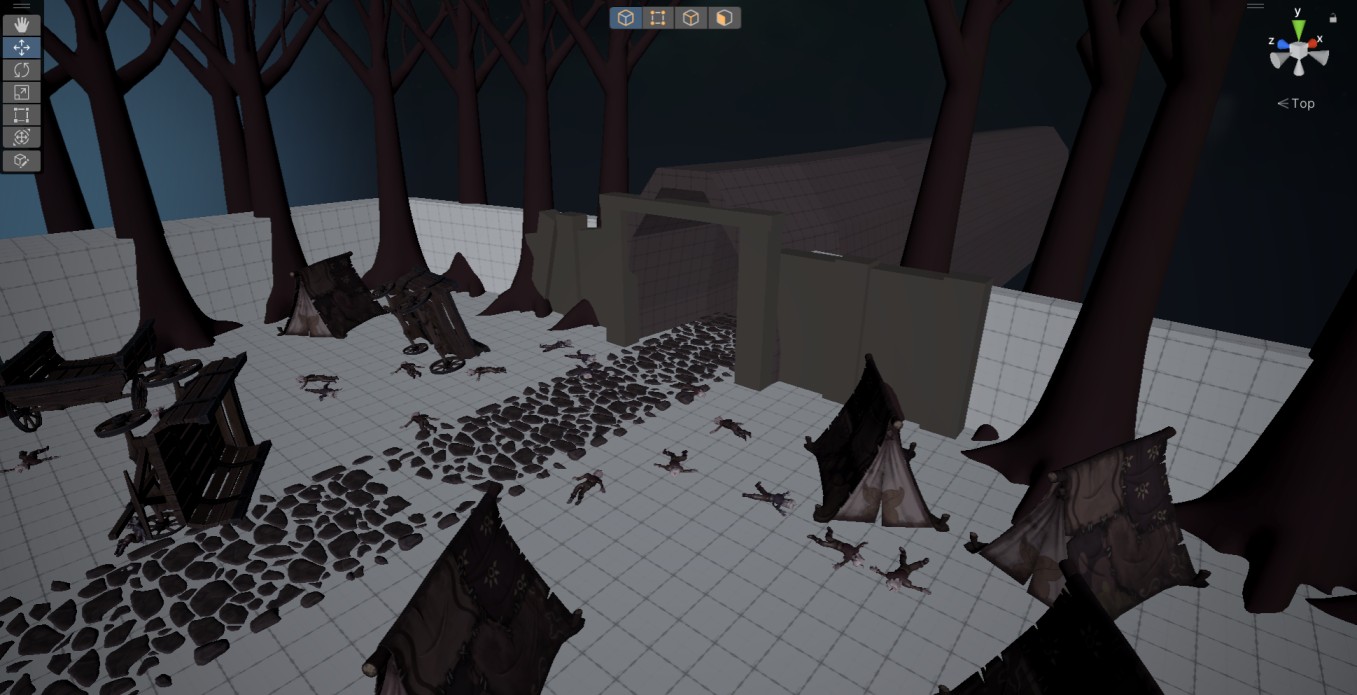
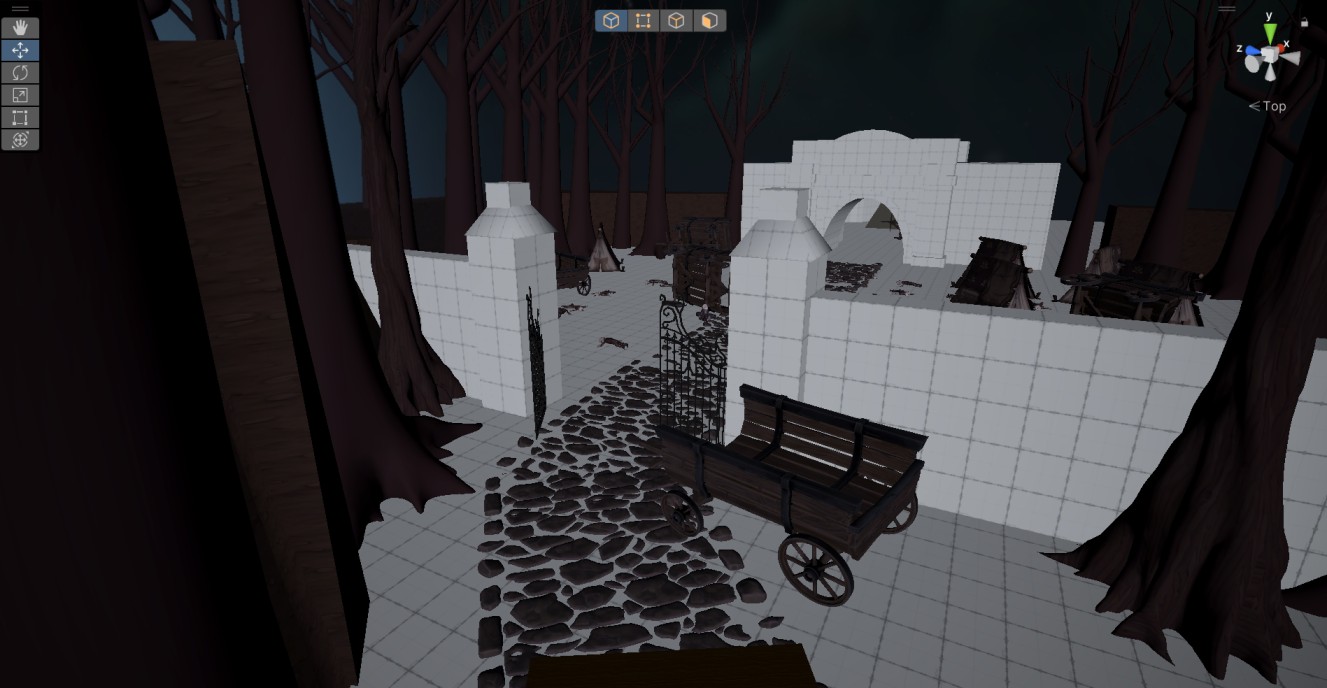
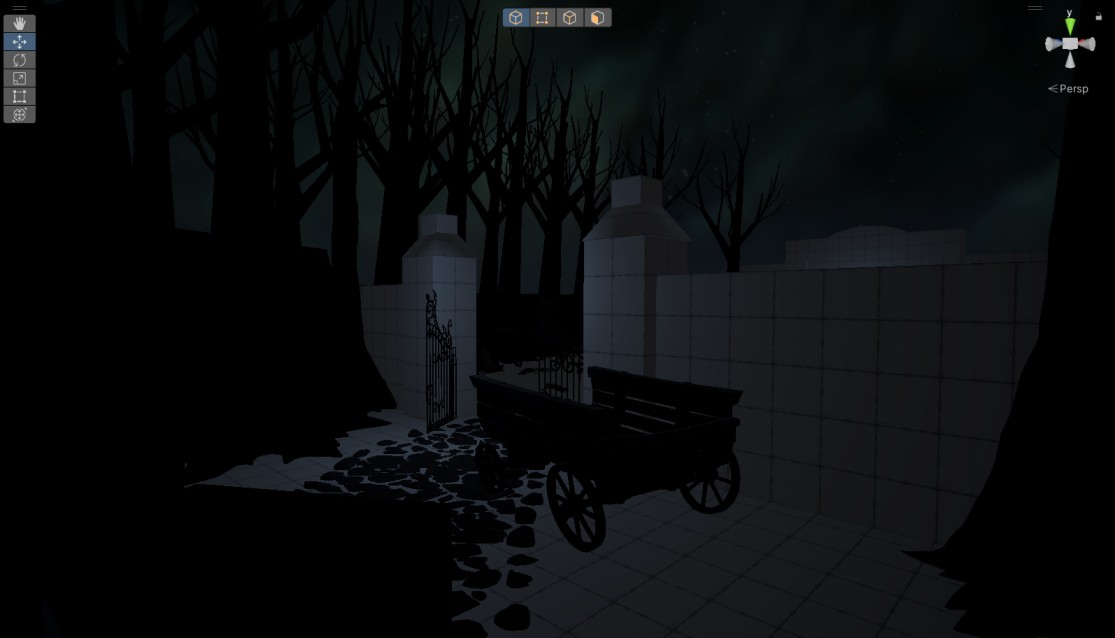
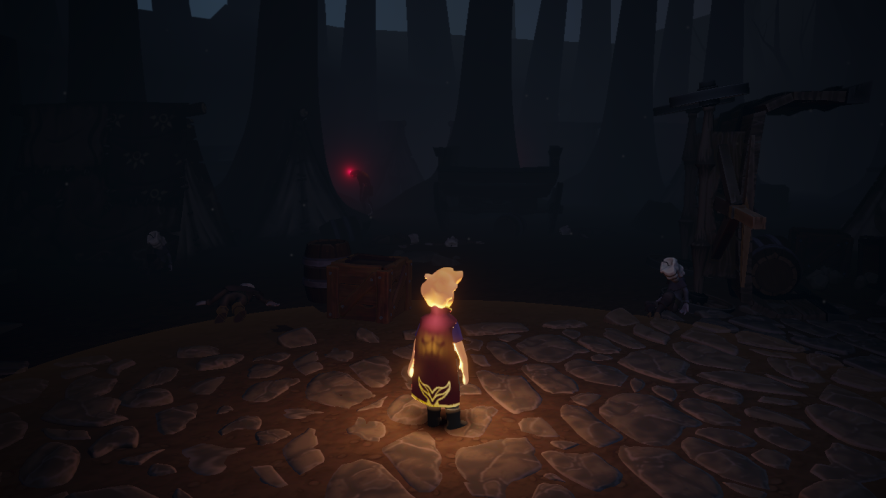
The abandoned trade route is blocked by empty wagons once carrying a vital resource. No voices, no movement – only ruins, scattered belongings, and the bodies of workers. Dangerous creatures lurk nearby.
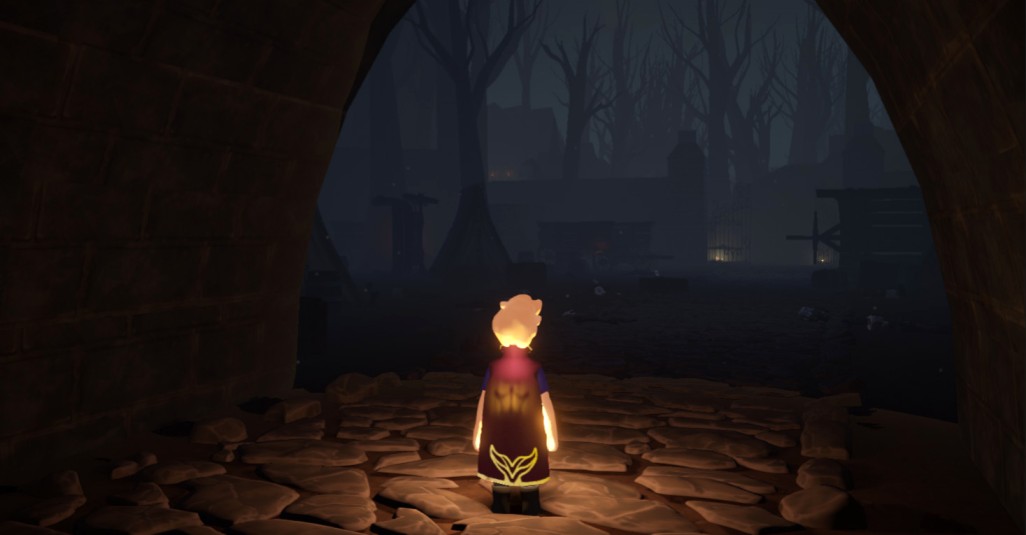
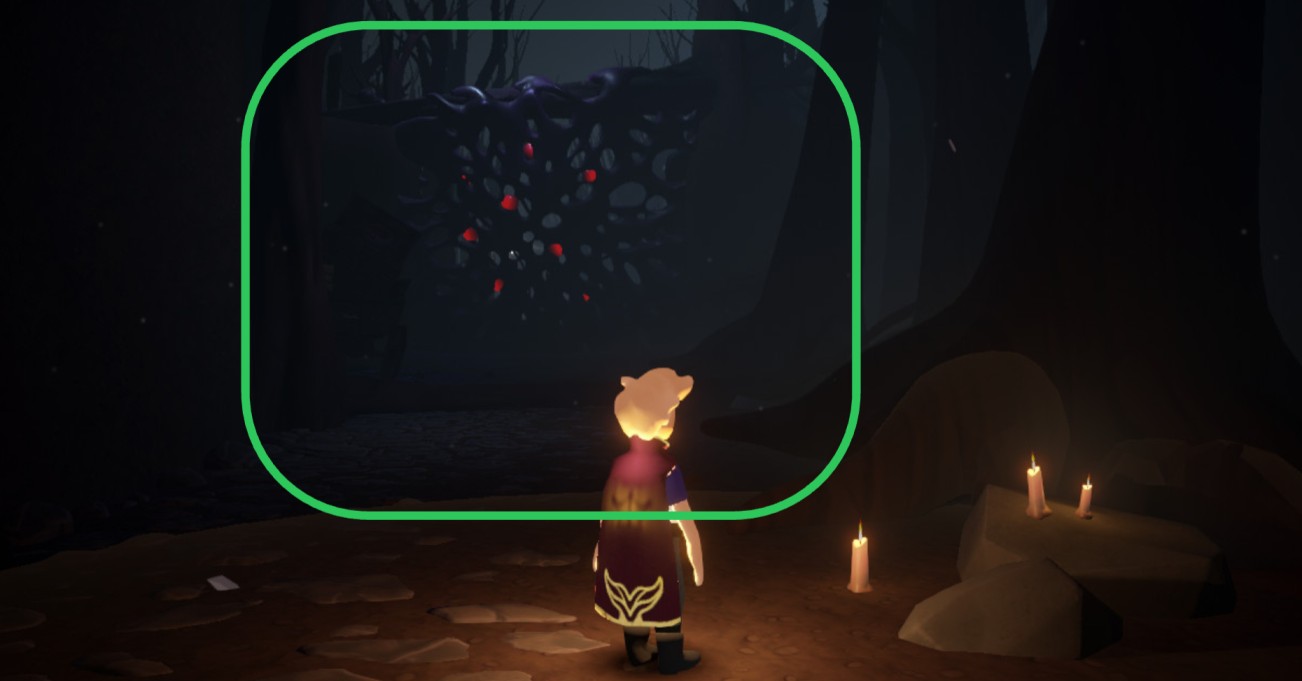
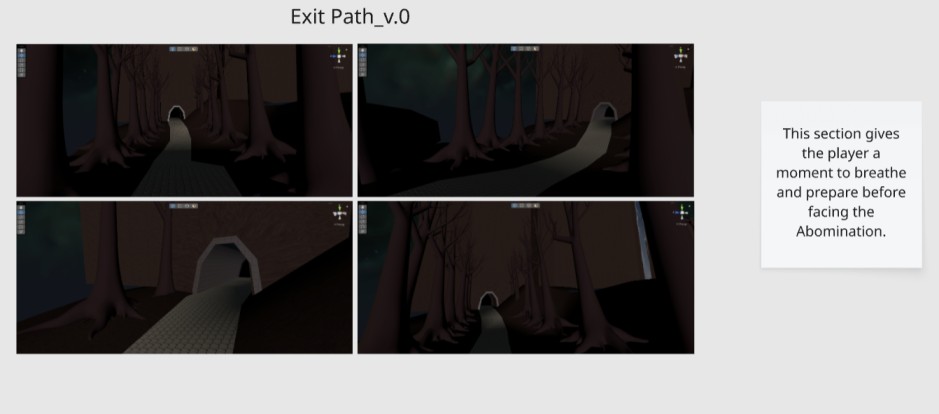
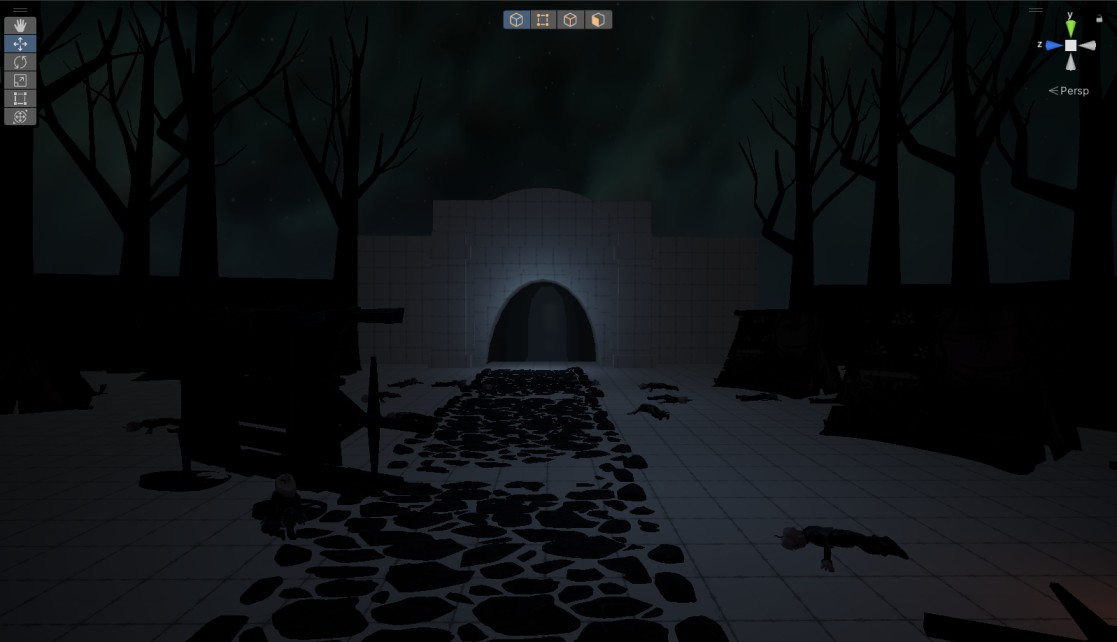
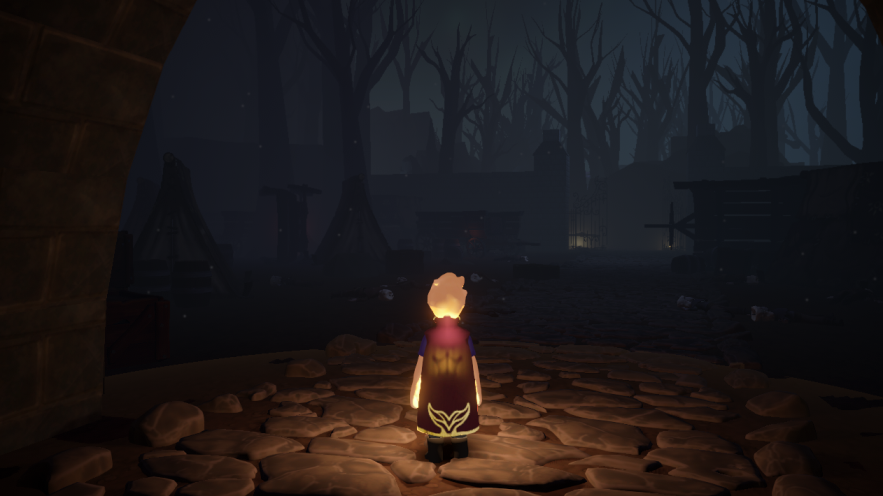
Hoping to find survivors, Wax Boy enters a ruined tunnel. No one is left inside. On the other side of this tunnel a new area begins – and a horrific enemy awaits.
Environmental Storytelling
Came up with small, self-contained stories within the level to make the world feel more believable.
Used framing to help players notice important environmental details.
Gradually placed environmental story beats along the main path to add visual and narrative variety.
Level Atmosphere, Navigation and Lighting
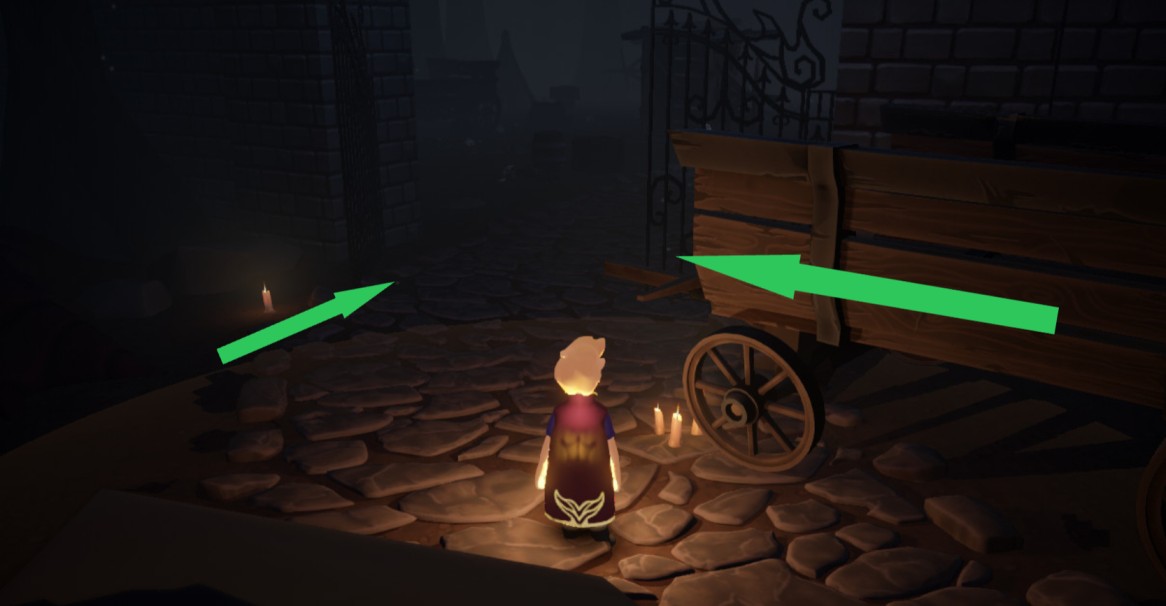
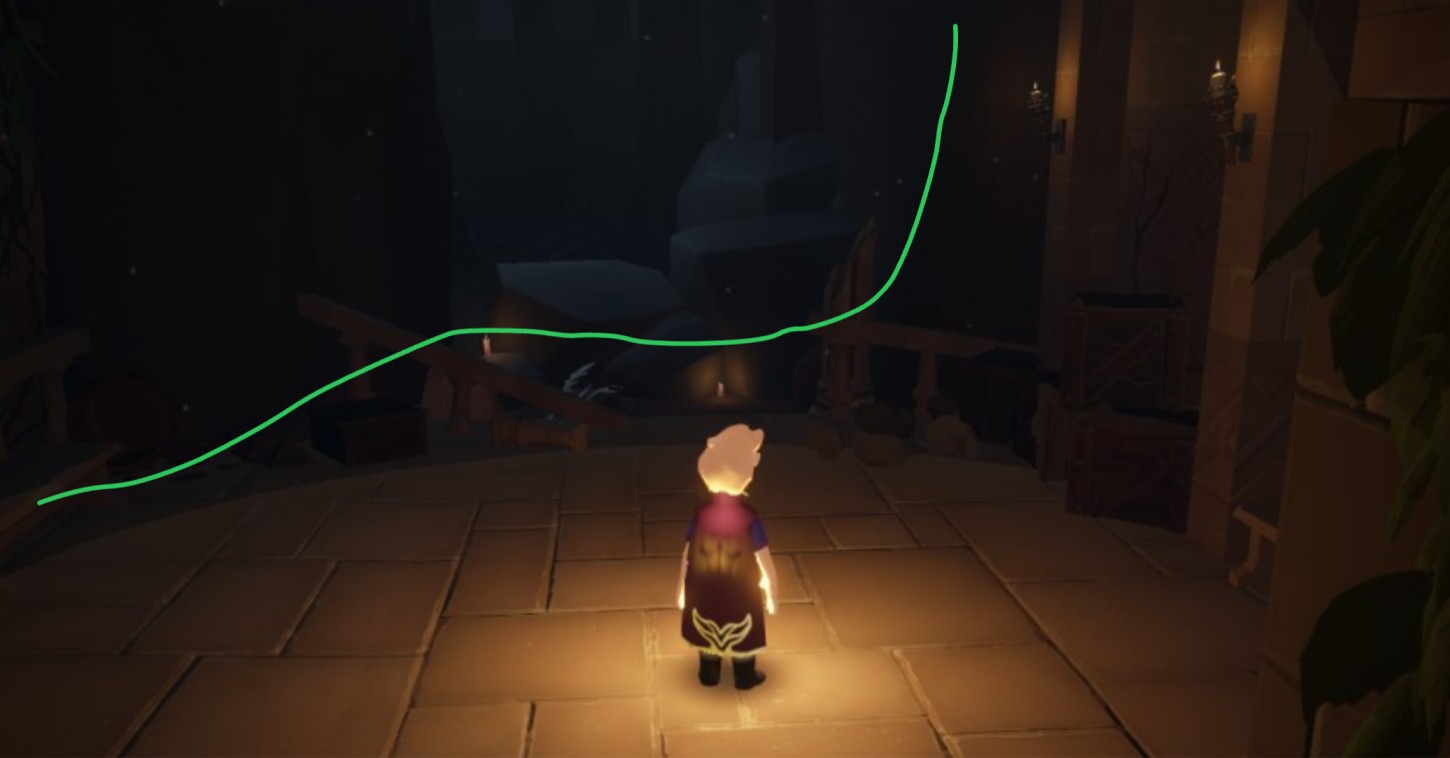
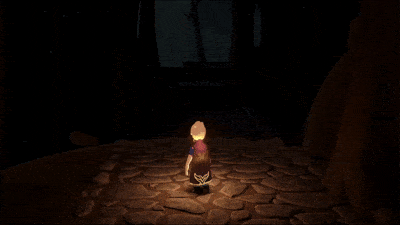
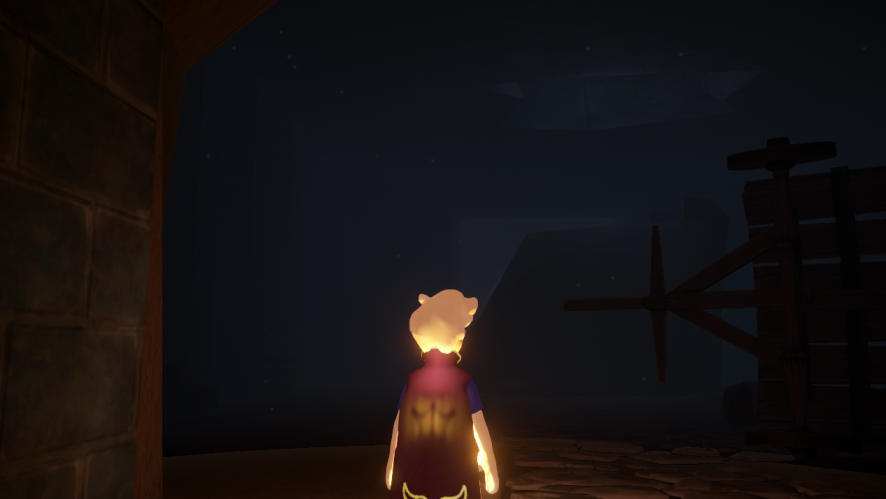
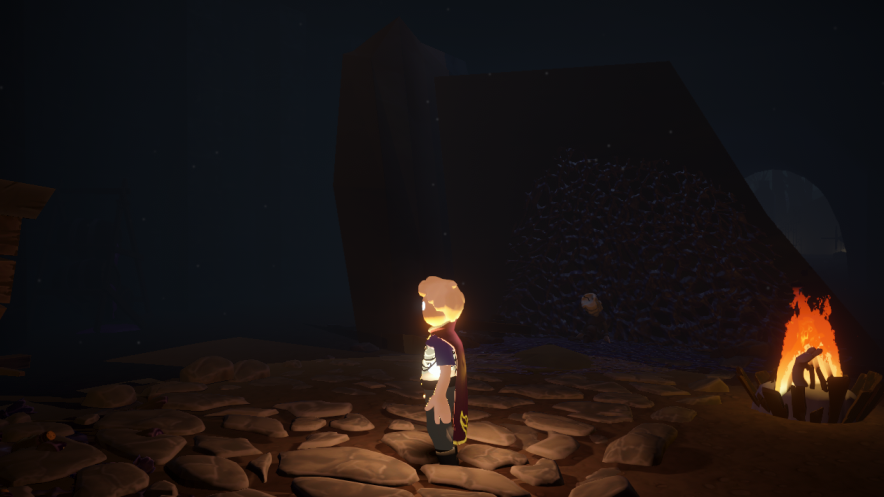
Used small light sources as breadcrumbs to guide player throughout the level.
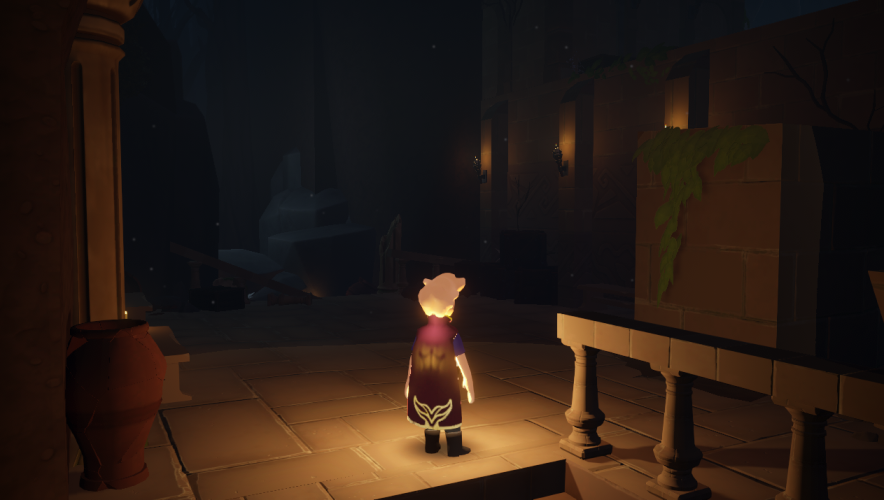
Added spotlights to key areas to direct the player’s attention.
Placed environmental objects in a way that subtly points the player in the correct direction, reinforcing navigation.
Walkthrough
Techniques
Player Guidance
Used geometry, leading lines and meshes to guide the player throughout the level. Placed breadcrumbs along the way.
Environmental Storytelling
Created small environmental scenarios to reveal more of the story and make the world feel more alive.
Framing
Used framing techniques and composition to highlight important areas and draw the player's attention to key gameplay beats.
Lighting and contrast
Used different types of lighting and shadow to make the main path and landmarks more visible.
Landmarks & POIs
Placed unique landmarks and POIs throughout the level to support player navigation.
Process
1: Research and planning
Goal: Understand how the level should look and what experience it should deliver to the player.
Process:
At the beginning of the process, I received a task from the producer to create a small narrative-driven location that would lead up to an encounter with a dangerous enemy.
At that point, the level in Unity consisted only of a simple tunnel with trees on both sides – this was the foundation I had to work with.
To start, I captured screenshots of the existing state of the level and briefly documented the intended purpose of this section, defining the role it should play in the overall player experience.
After that, I explored multiple directions in Miro, creating four different concepts for the narrative and overall look of the location. At this stage, I primarily used level design sketches to quickly pitch and communicate my ideas.
Result: After the pitch, the producer selected concept №4 for further development. It became the foundation for the level’s final narrative direction.
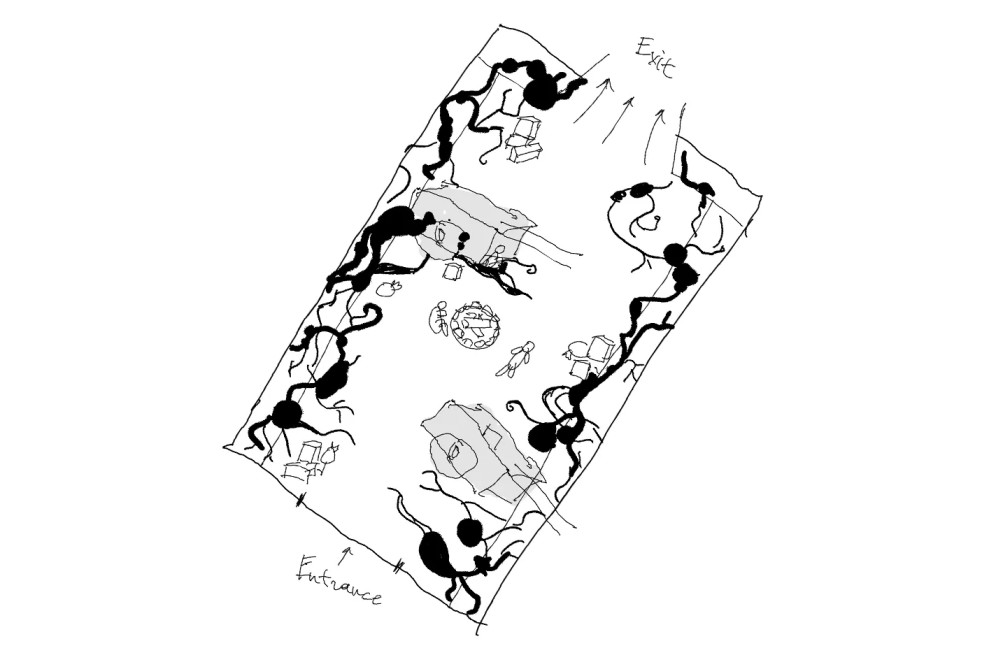
2: Game beats & 2D Map
Goal: Create a 2D layout of the level and define its main gameplay beats.
Process:
After one of my concepts was approved, I developed it further to clearly communicate the key moments of the level to the producer.
Considering the constraint of using existing assets, I emphasized during the presentation that the environment would be built entirely using the current asset library, without the need to create new assets.
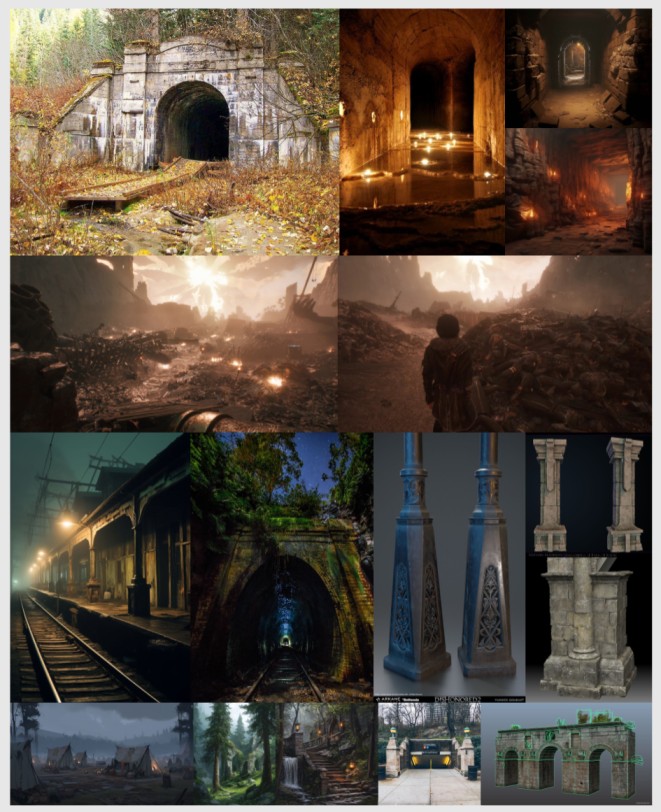
I also supported my sketches with references to convey the intended mood and atmosphere of the location. My goal was to create a quiet, melancholic tone – giving the player a moment of respite after the previous sections and setting up the encounter with a major enemy.
References
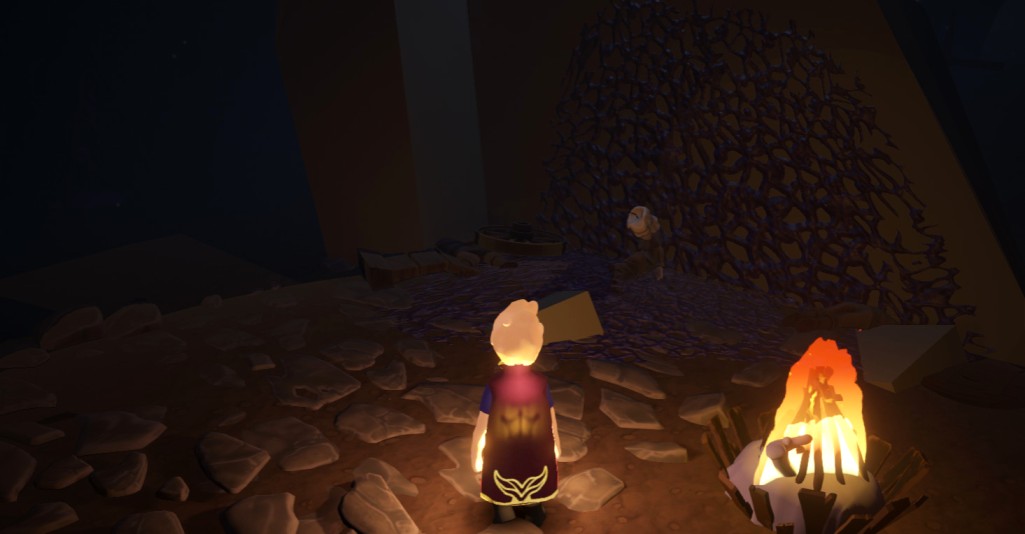
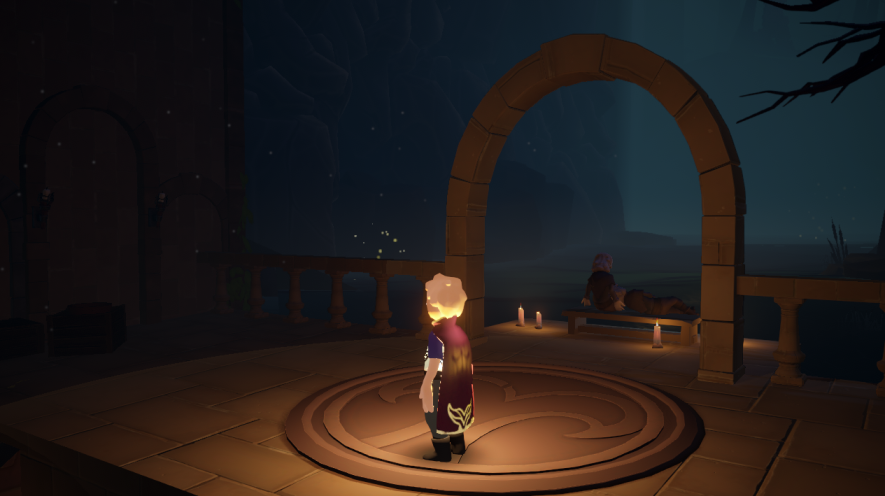
At this stage, I also introduced the idea of subtle environmental drama. A key moment was the open workers’ camp, where the player would discover that it had been completely destroyed.
Result: The producer approved the expanded concept and level direction. The only adjustment was to postpone adding ichor corruption assets to the exterior of the tunnel.
3: Creating the Roughout
Goal: Define the level metrics, estimate the time required for the player to complete the area, and place POIs and landmarks.
Process:
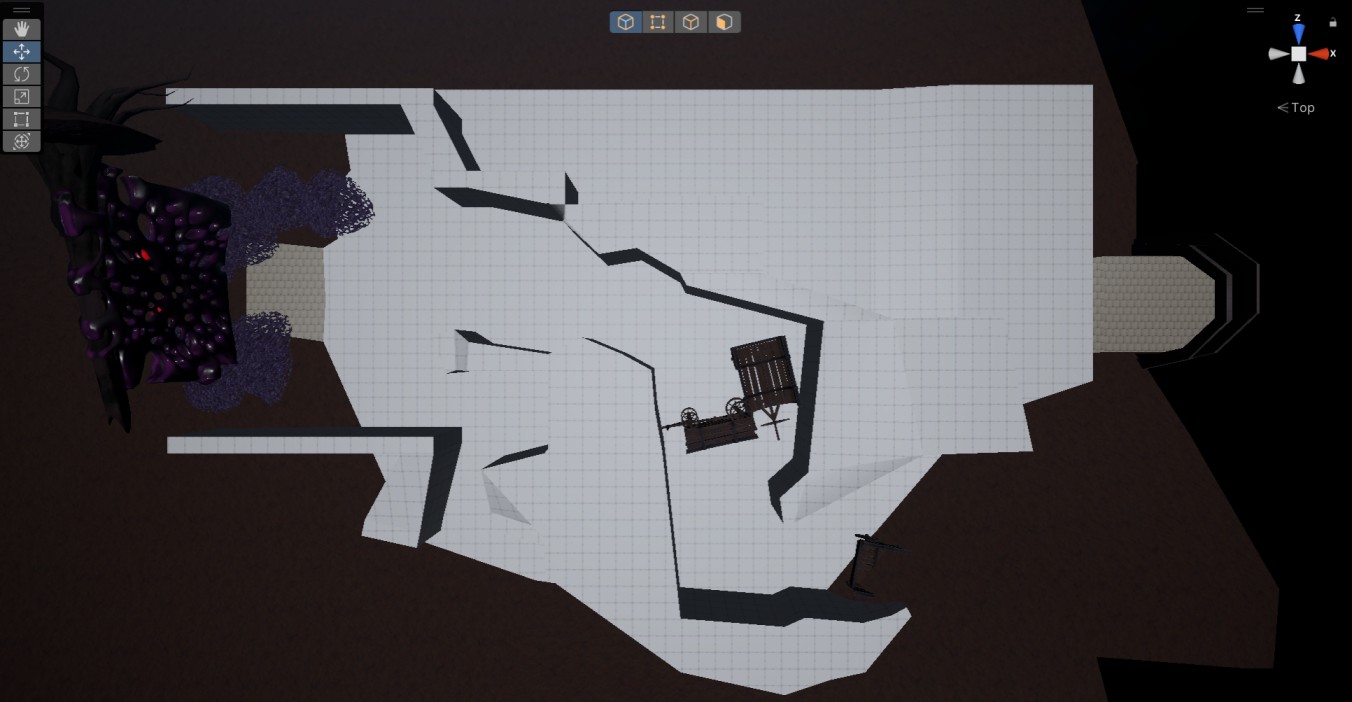
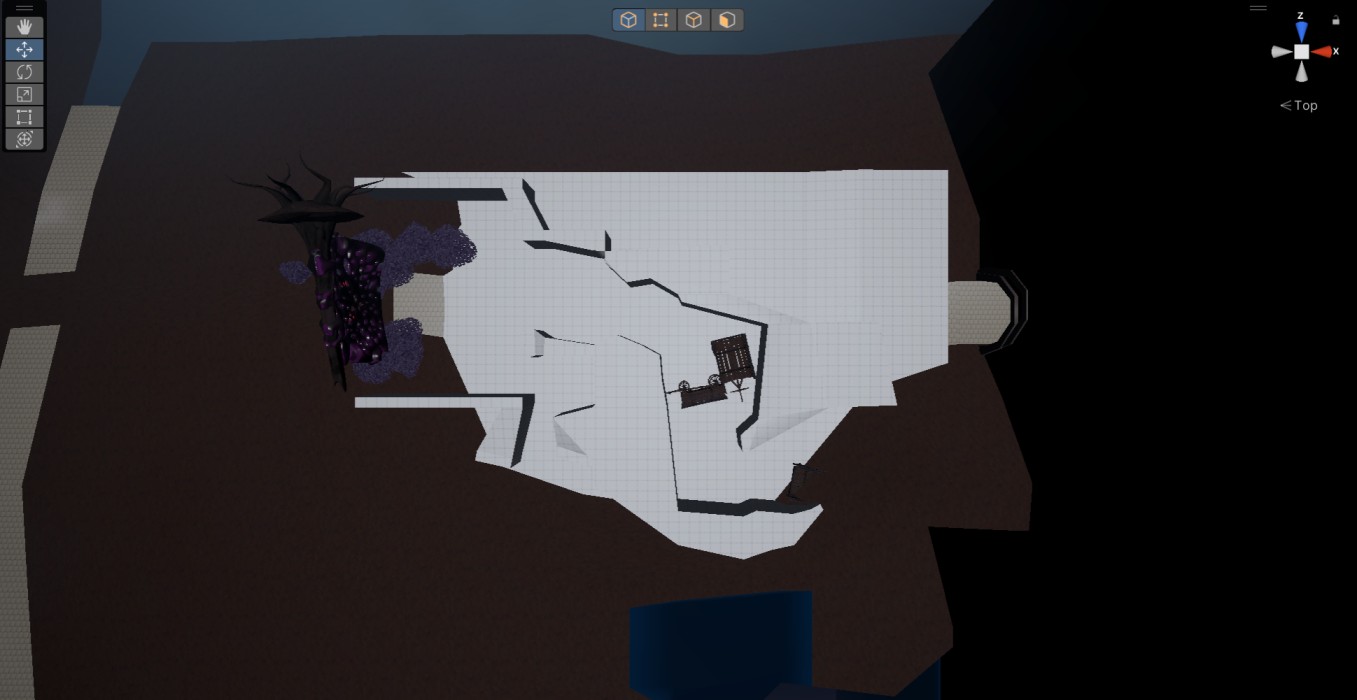
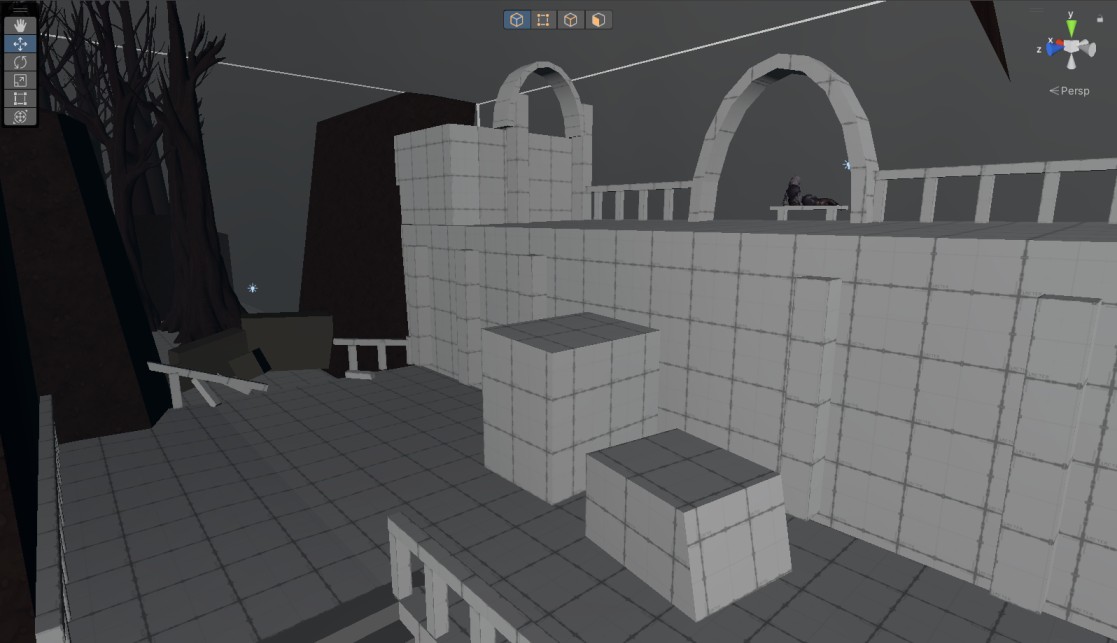
At this stage, I moved into Unity and began blocking out the level using simple geometry in ProBuilder. My goal was to define the overall scale of the location and determine the placement of key points.
After the first iteration, I shared the progress with the team, gathered feedback, and made adjustments to the geometry before continuing to refine the layout.
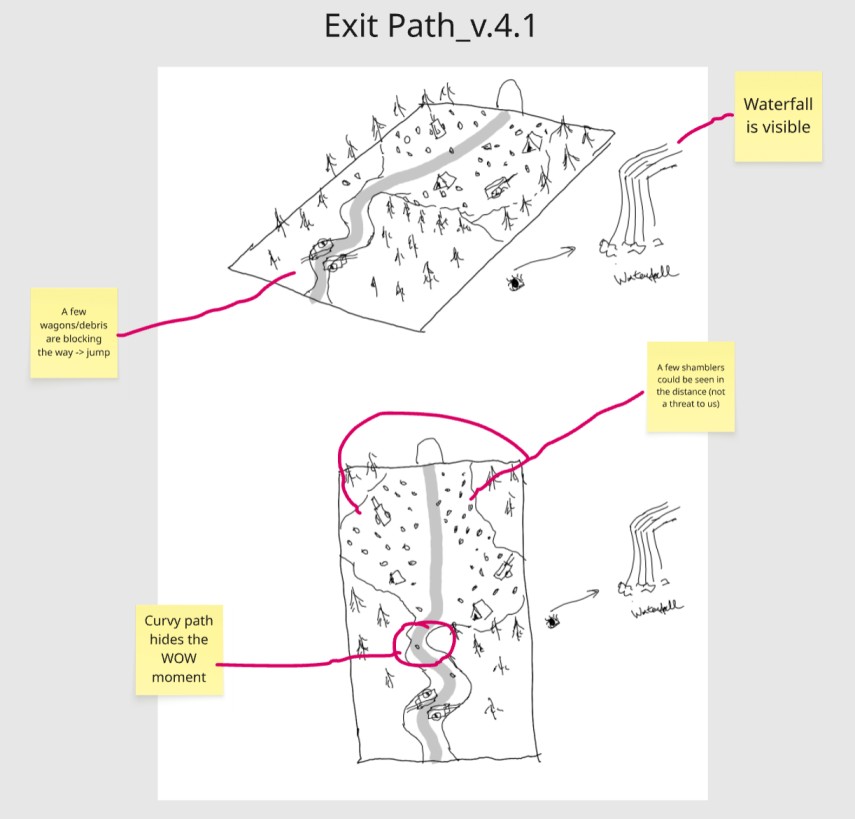
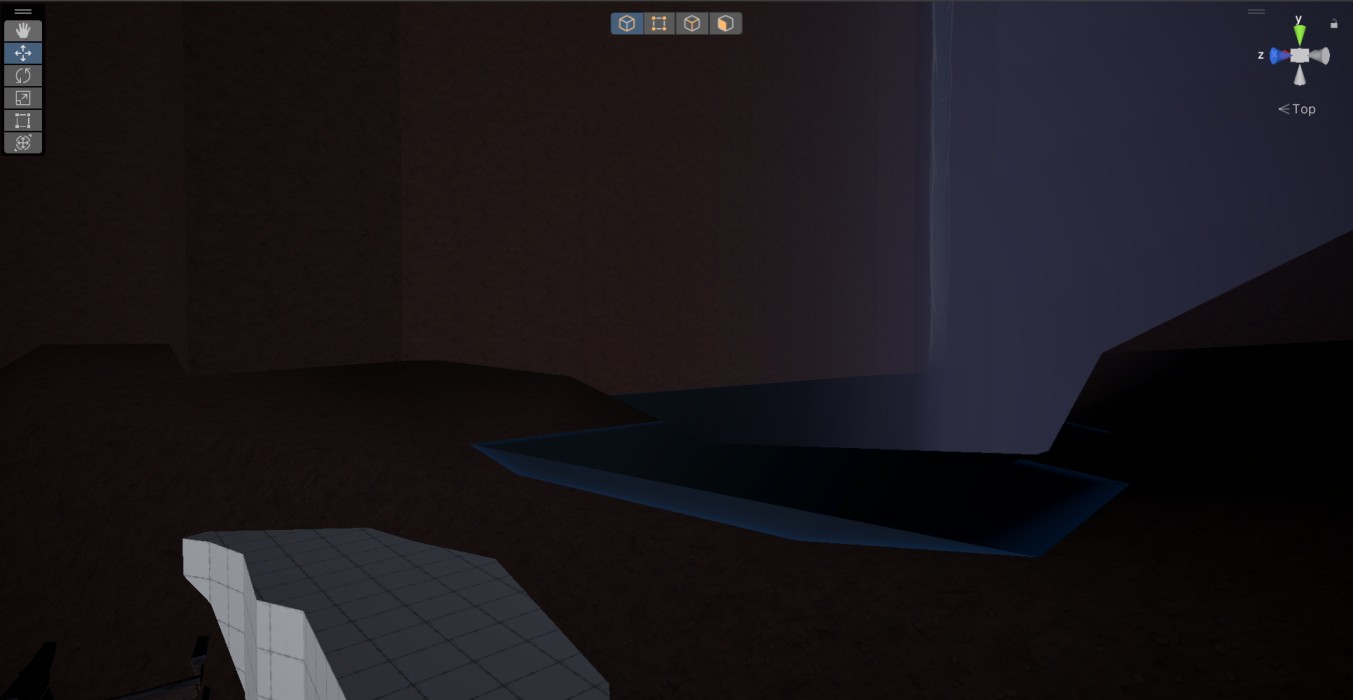
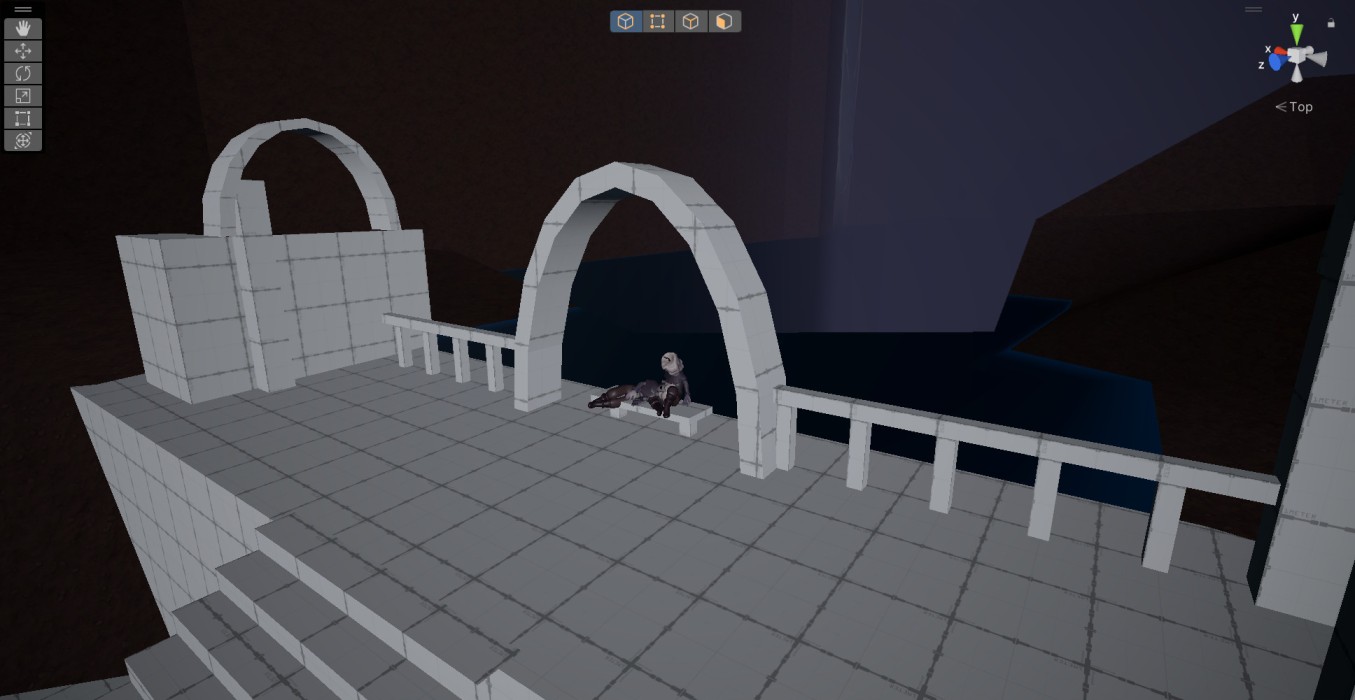
During the sketching phase, the producer and I agreed on including a vista overlooking a waterfall located on a lower level, which I incorporated into the blockout.
Result: I created an initial blockout of the level using simple geometry in ProBuilder and added a few existing assets to better convey the intended mood. The level’s scale and estimated completion time met the producer’s expectations at this stage, allowing me to move forward to more detailed iteration.
4: Moving to the Blockout
Goal: Create a playable level that communicates the main idea and pacing using simple geometry. Implement basic scripts.
Process:
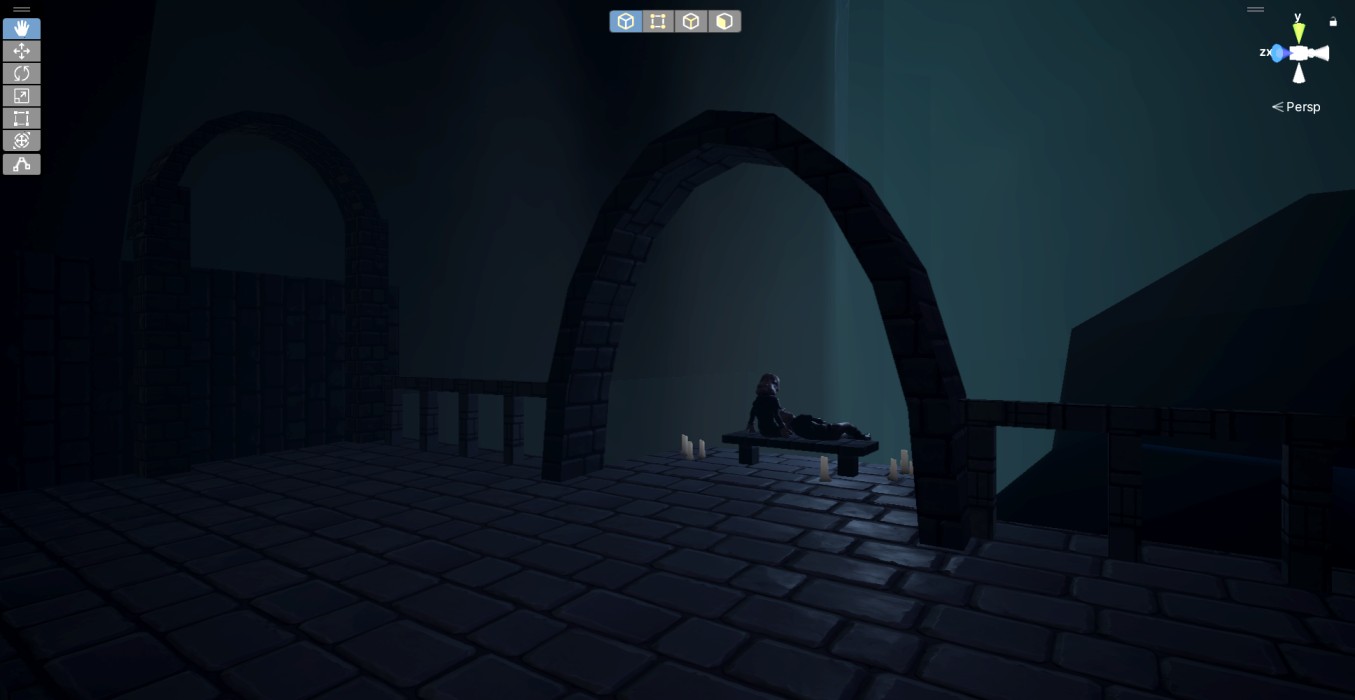
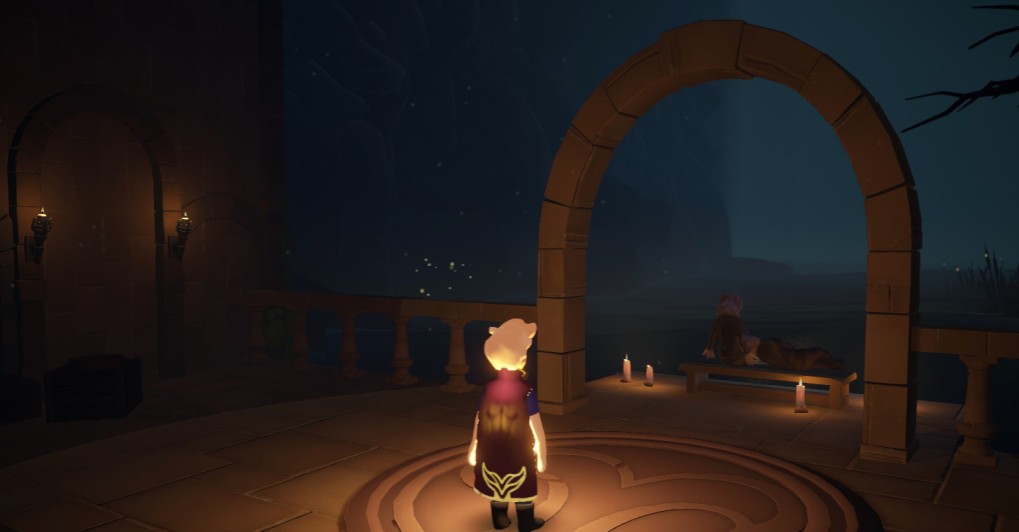
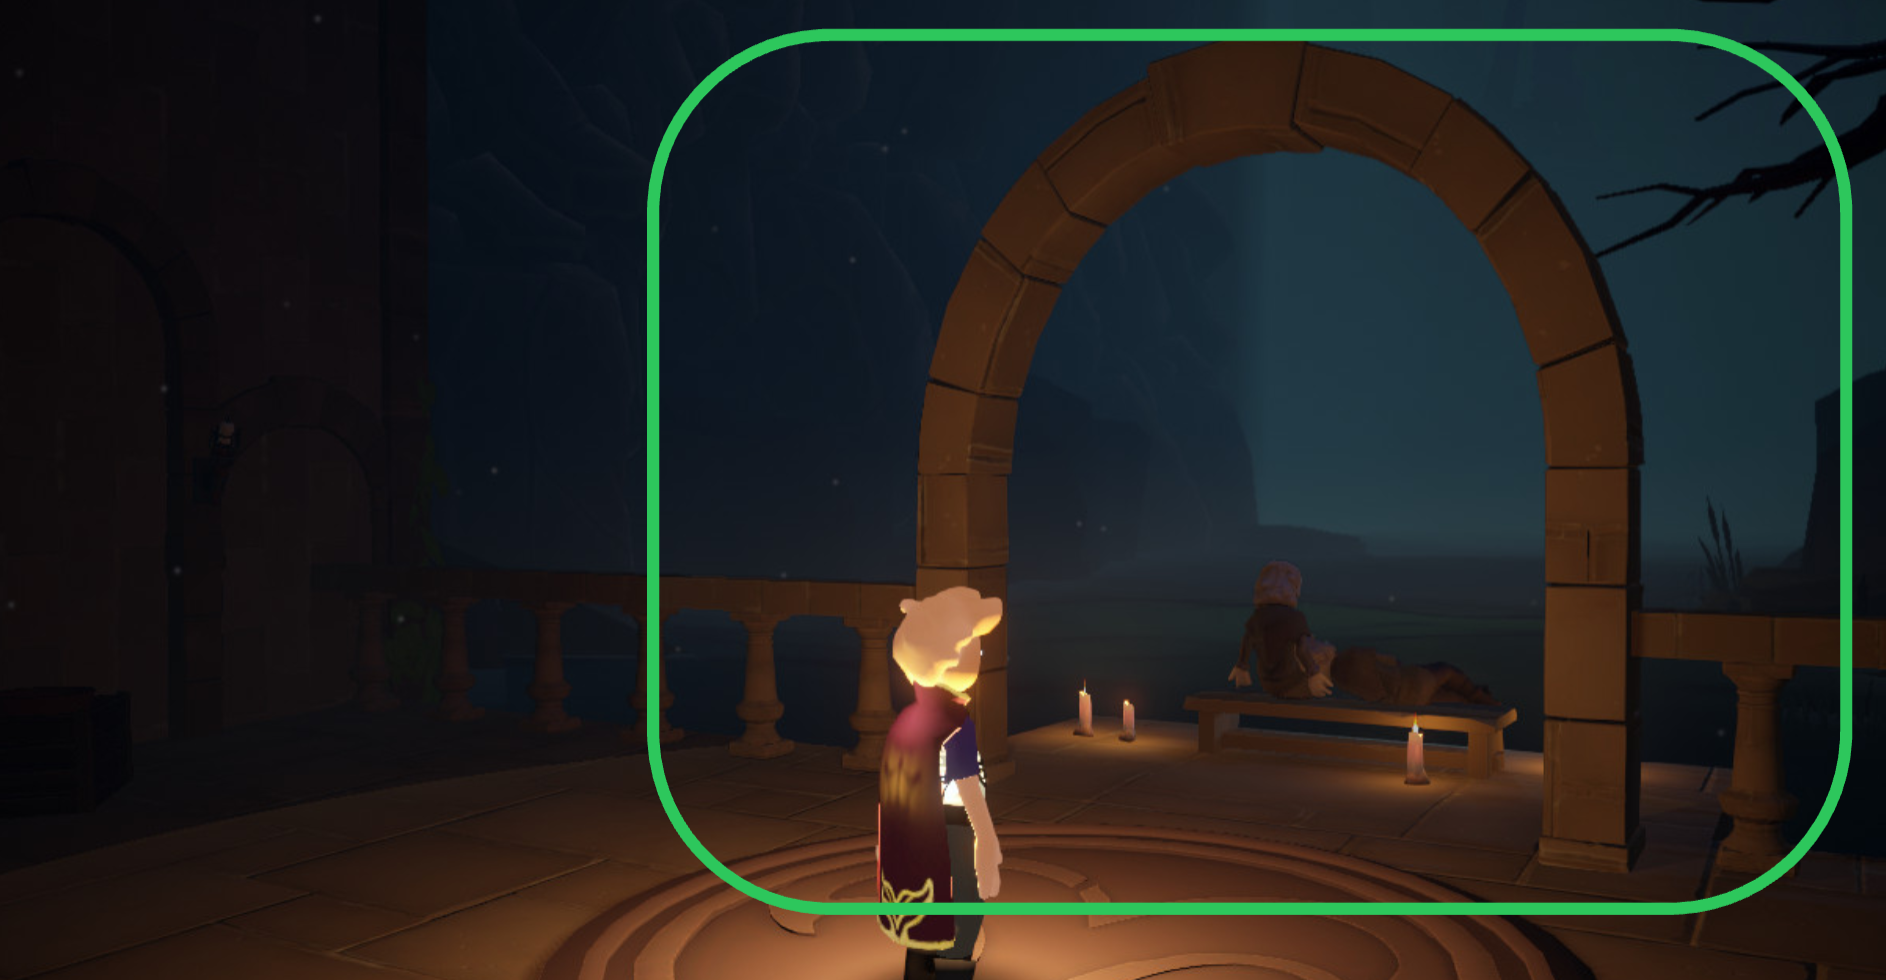
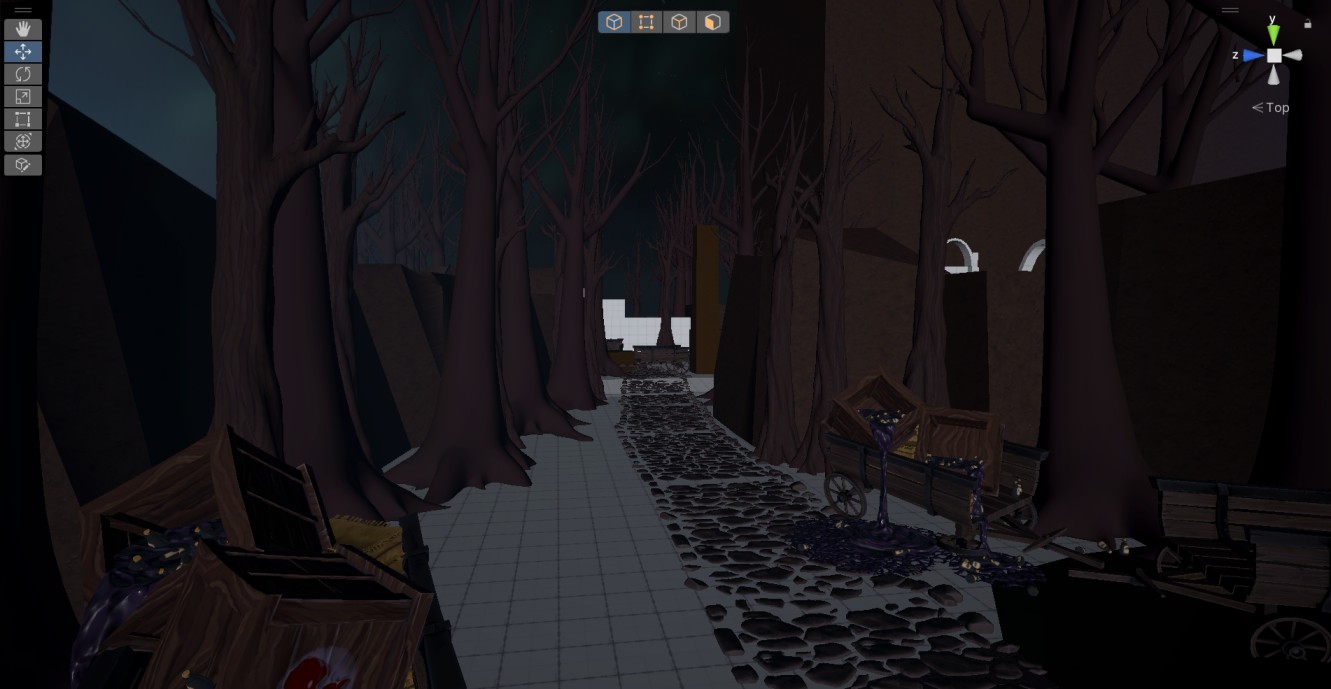
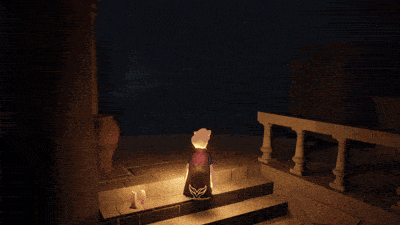
During this stage, I introduced an environmental storytelling moment to support the waterfall vista. I pitched the idea of ruins where the player could find two “extinguished” candle people, who had been comforting each other during the cataclysm at the beginning of the game. The producer approved the concept, and I visualized it within the blockout.
At the same time, I began replacing some grey grid surfaces with simple colored materials created in-engine. This helped improve visual differentiation and communicate intended material usage to the team.
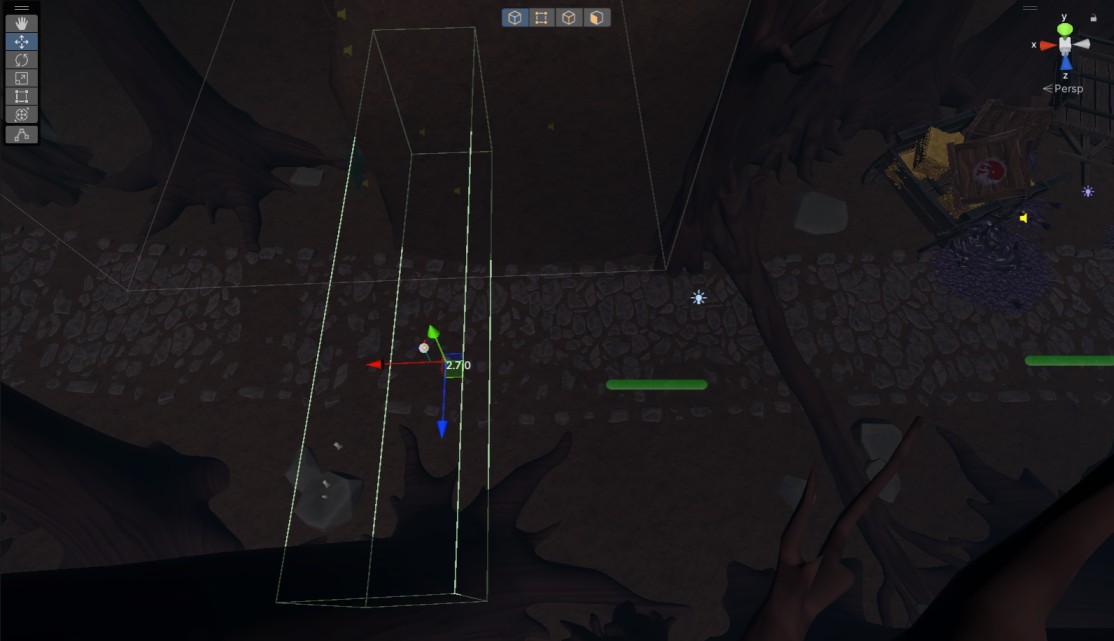
To make the level feel less static, I took the initiative to introduce a small animated event – a falling tree that blocks the player’s path, forcing them to turn back and notice the route toward the waterfall vista.
I initially prototyped it using simple geometry and basic Animator functionality, and later replaced it with a production asset and refined the animation. The event is triggered when the player enters a trigger volume.
First iteration
Second iteration
Result: This iteration added more detail and clarity to the level, making its final vision easier to understand. The producer approved the changes, including the narrative moment at the waterfall and the falling tree event, and we proceeded to the next stage.
5: Iterating the Blockout
Goal: Set up lighting and breadcrumbs throughout the level. Enchance navigation and framing. Get a blockout of the Tunnel section.
Process:
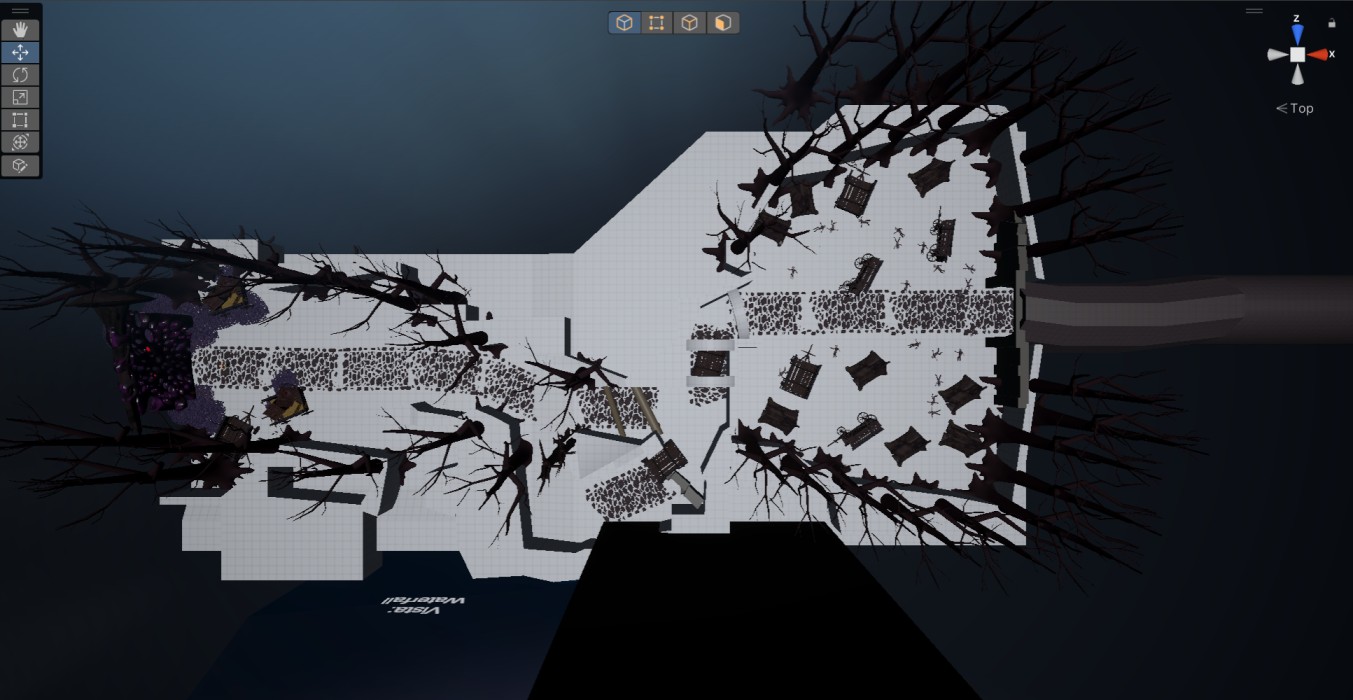
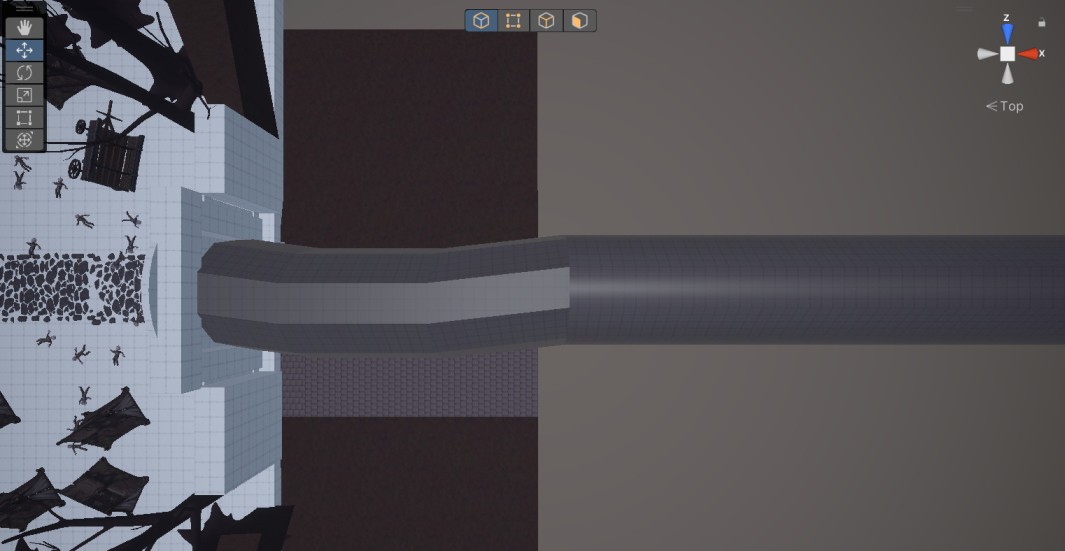
At this stage, I focused on building the blockout for the interior of the tunnel and introducing initial environmental storytelling elements.
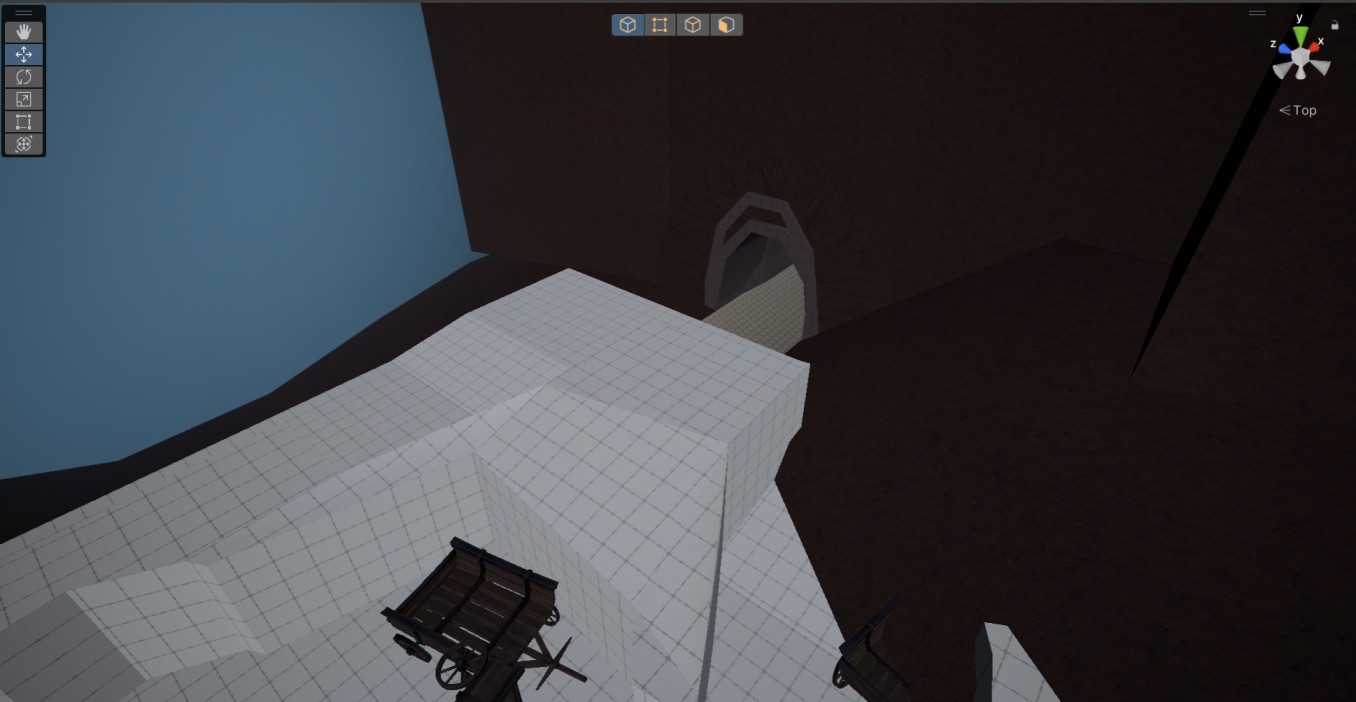
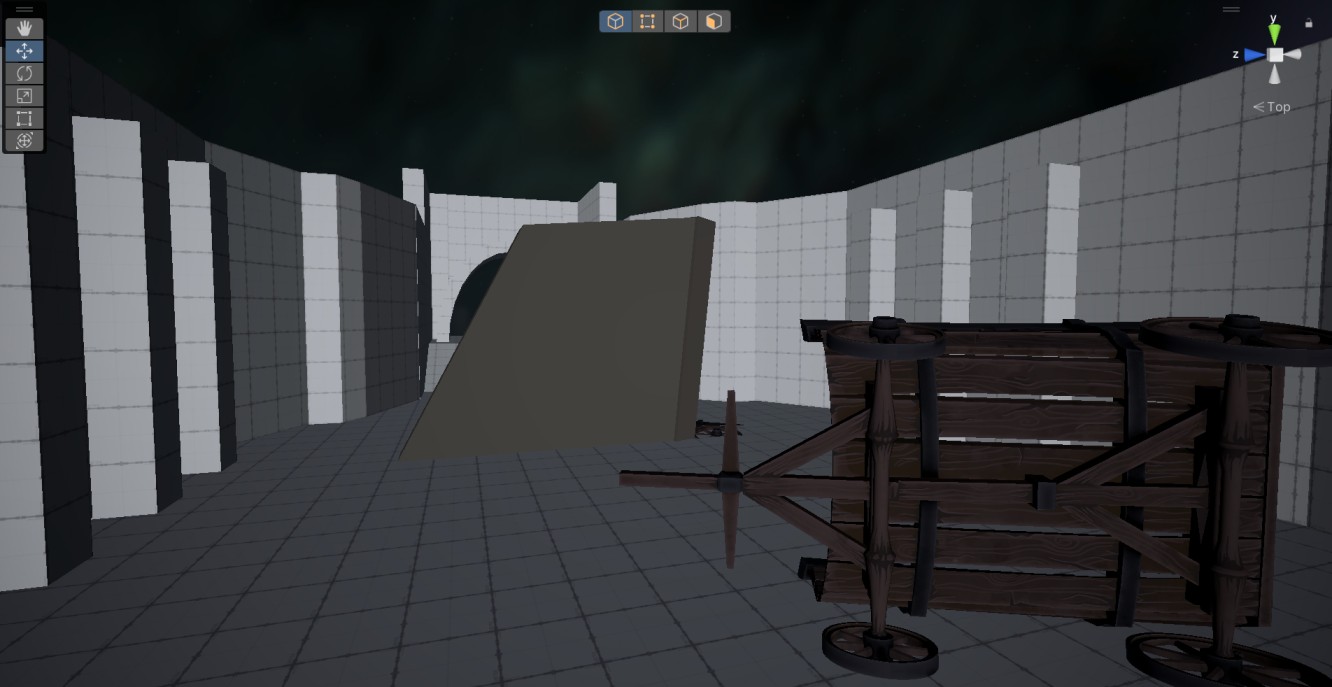
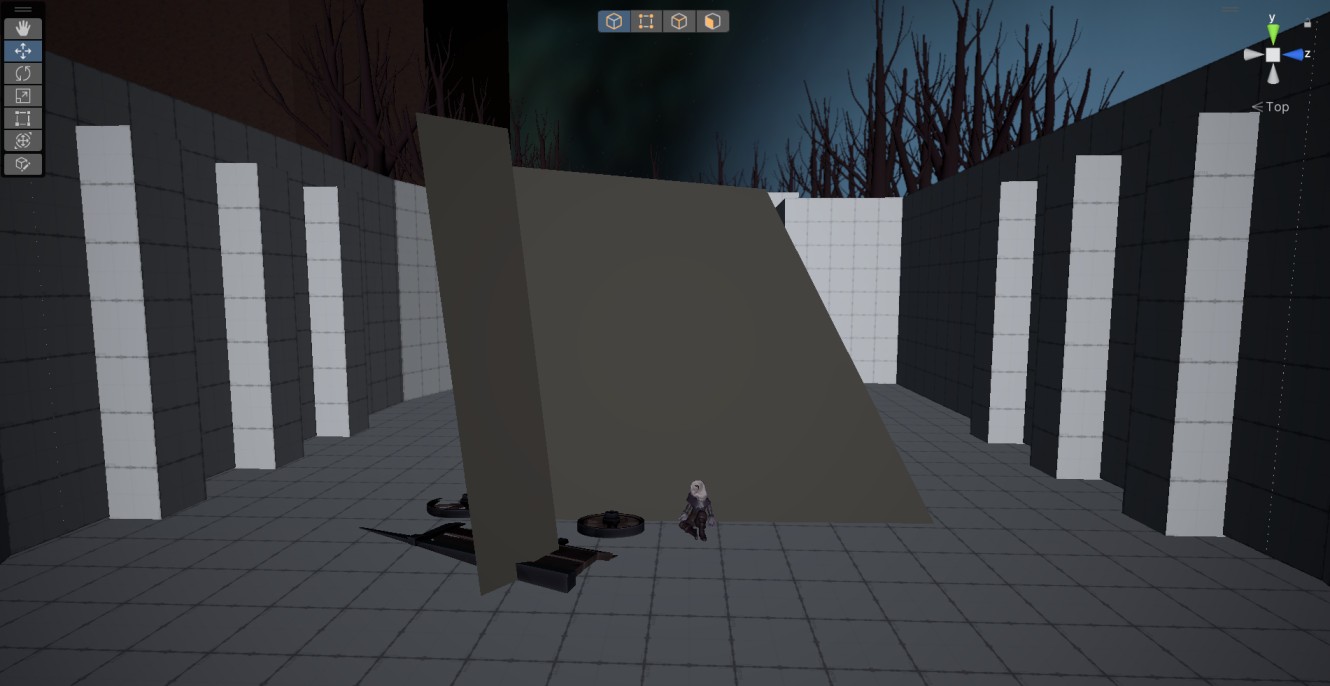
I also refined the tunnel entrance, improving its geometry to better match the intended design.
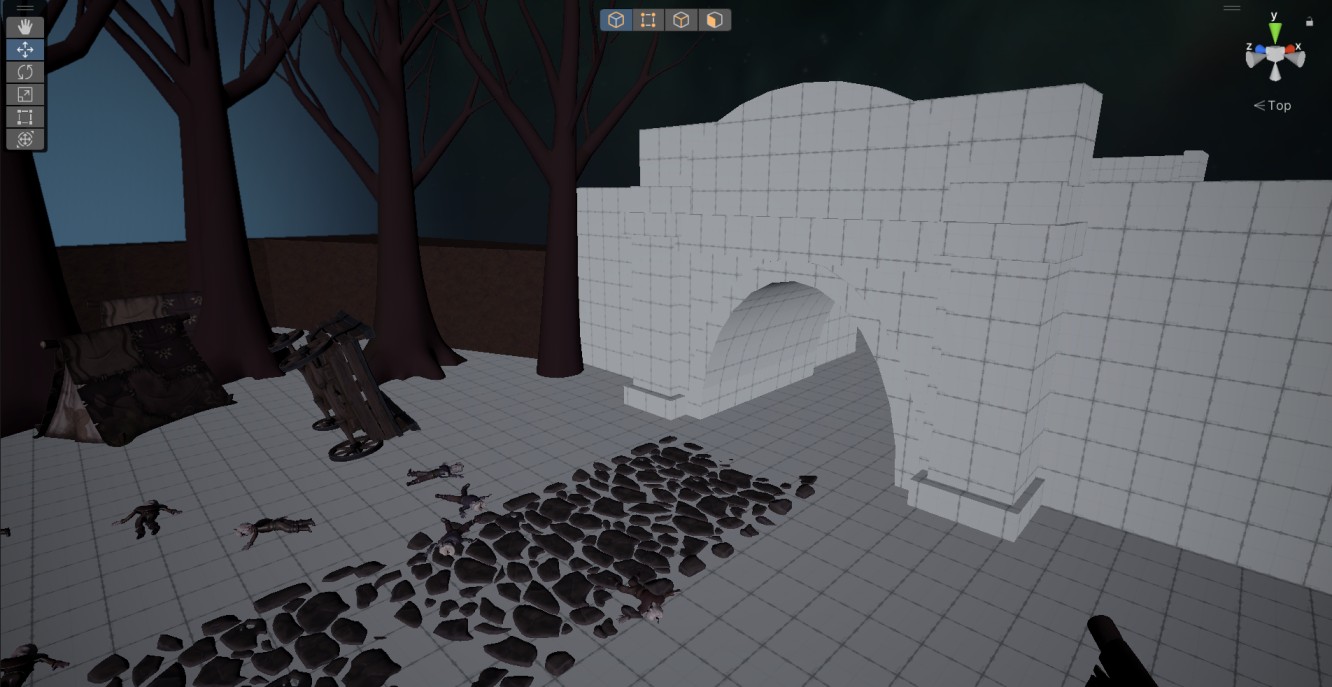
Additionally, I enclosed the workers’ camp area and added slightly open gates to subtly invite the player to move forward.
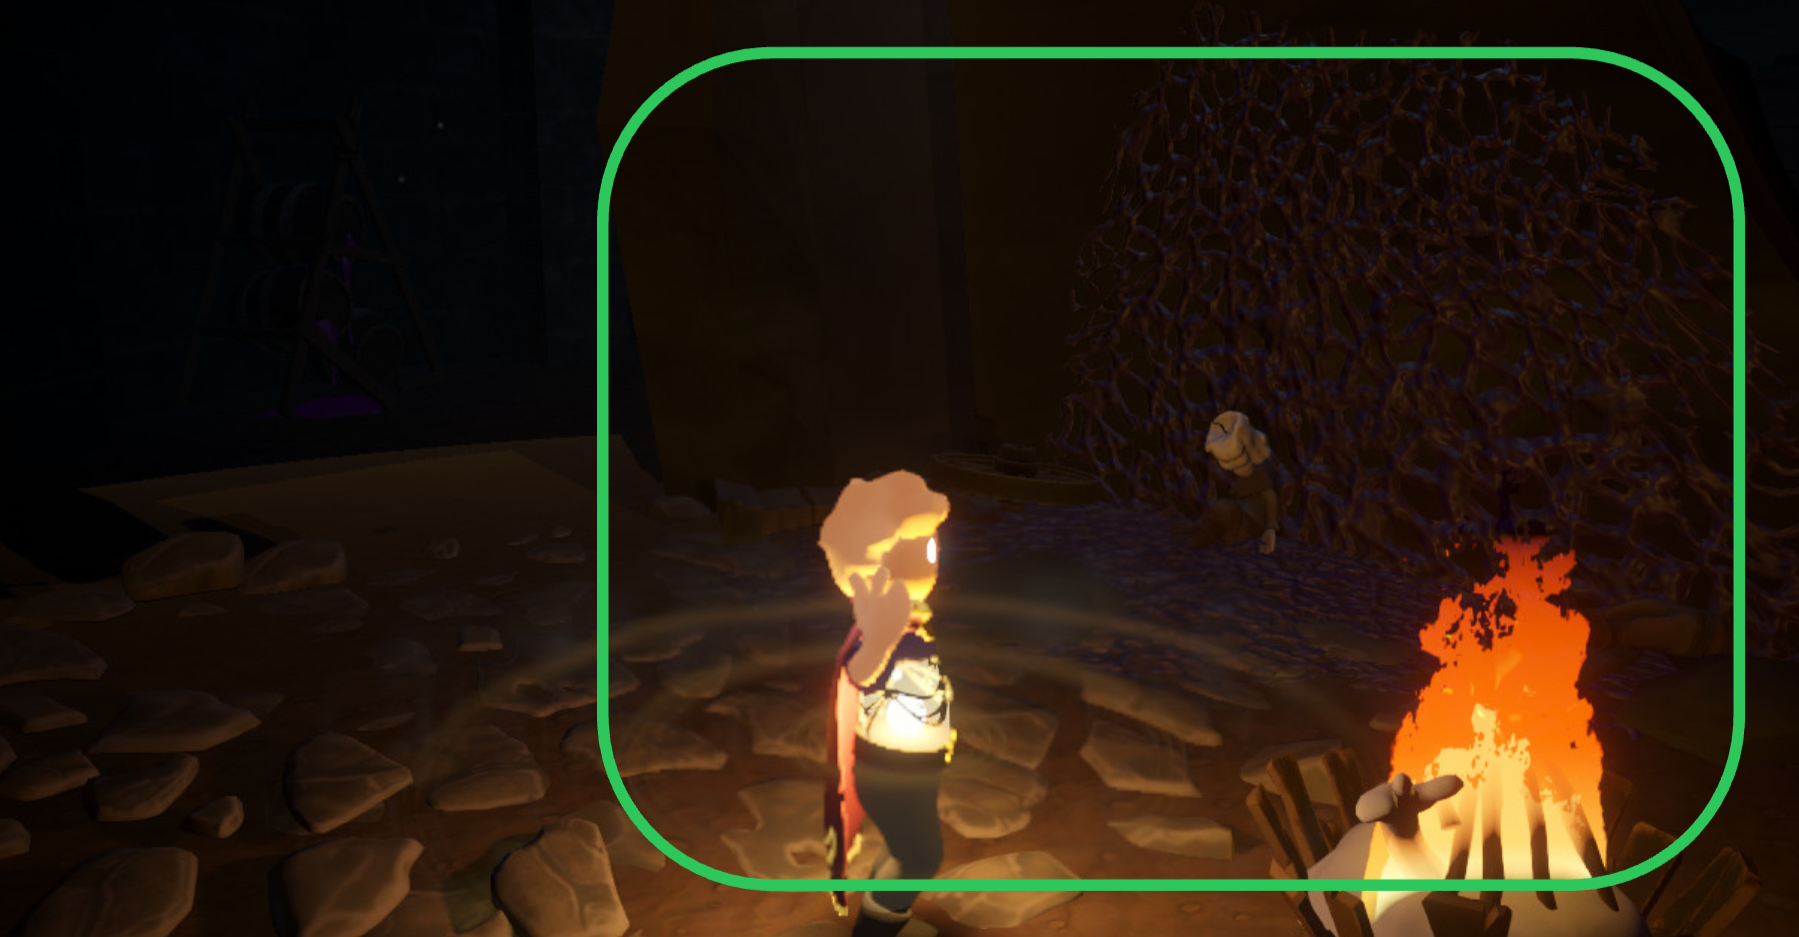
I continued enriching the level with details, including placing distant enemies within the camp to support environmental storytelling.
I also baked the navmesh for them to ensure proper behavior.
Finally, I set up initial lighting to improve player navigation and reinforce key paths.
A small adjustment was also made to the waterfall vista area: at the producer’s request, the collapsed staircase was replaced with stone blocks to allow for more traversal jumps.
Before
After
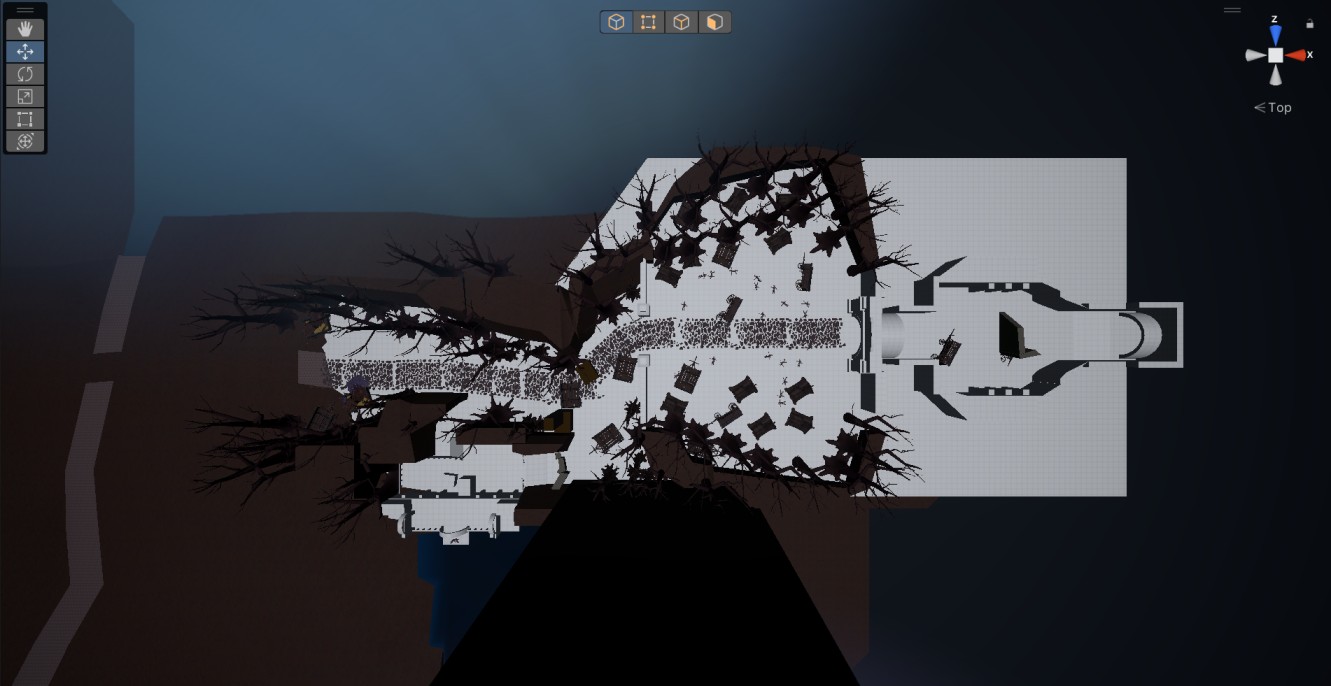
6: Refining the Blockout
Goal: Create a fully playable and tested level populated with project assets and textures. Place checkpoints and chunk loaders.
Process:
Implemented and configured checkpoints across the level to support player progression.
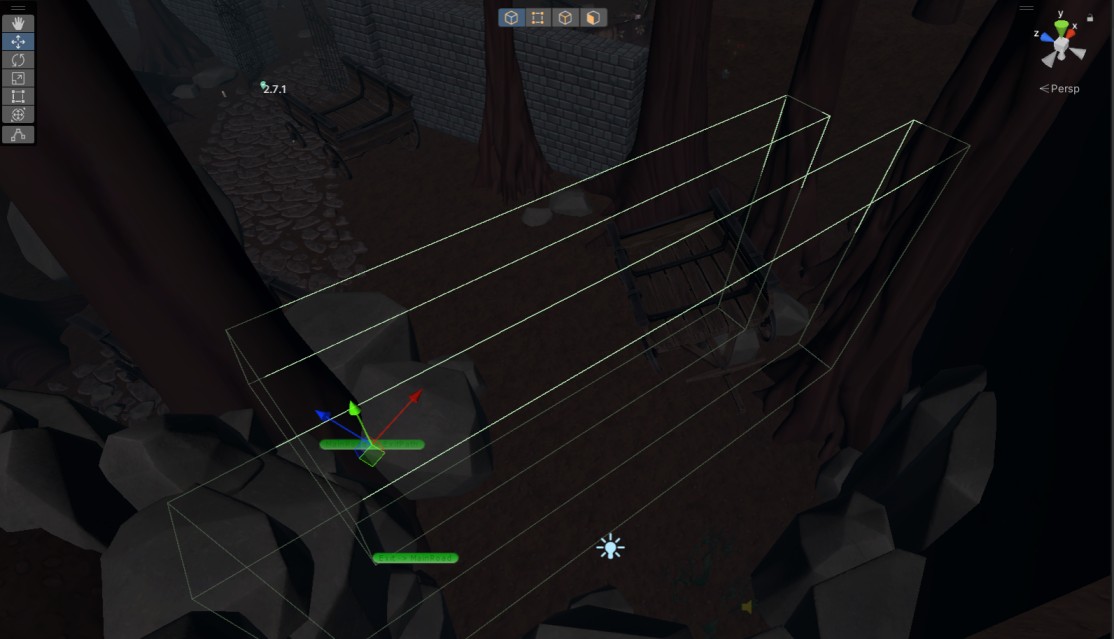
Set up chunk loaders (trigger volumes that load and unload parts of the level as the player moves through them) to improve performance and optimization.
Checkpoint Example
Chunkloader Example
Towards the end of the blockout phase, created and configured a fog profile tailored to the location. Fog is a core visual component of our environments.
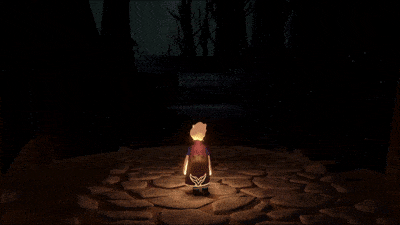
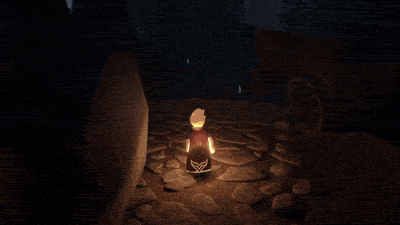
Ensured that small guiding light sources were properly placed throughout the level to support navigation. In this project, we use candle or glowing mushroom prefabs – candles were chosen for this location.
After a team playtest, fixed minor geometry and collision issues, and prepared the level for handoff to the art team.
Result: A fully playable, bug-free level with configured lighting, fog, and navigation cues. Checkpoints and chunk loaders were implemented and tuned, and the level was ready for art production.